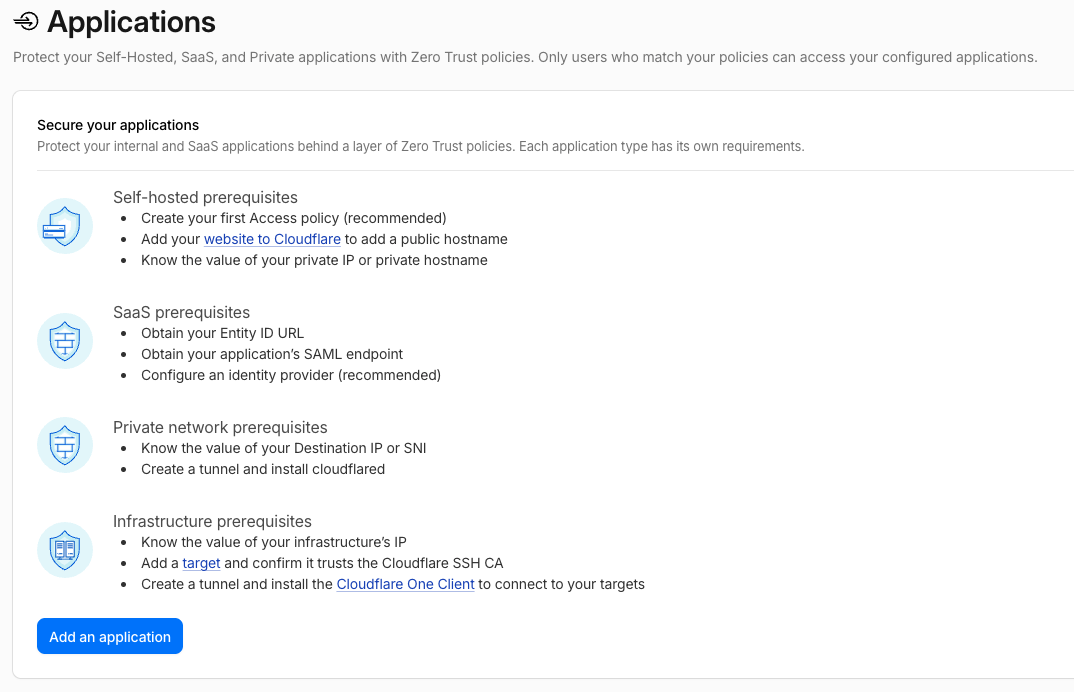
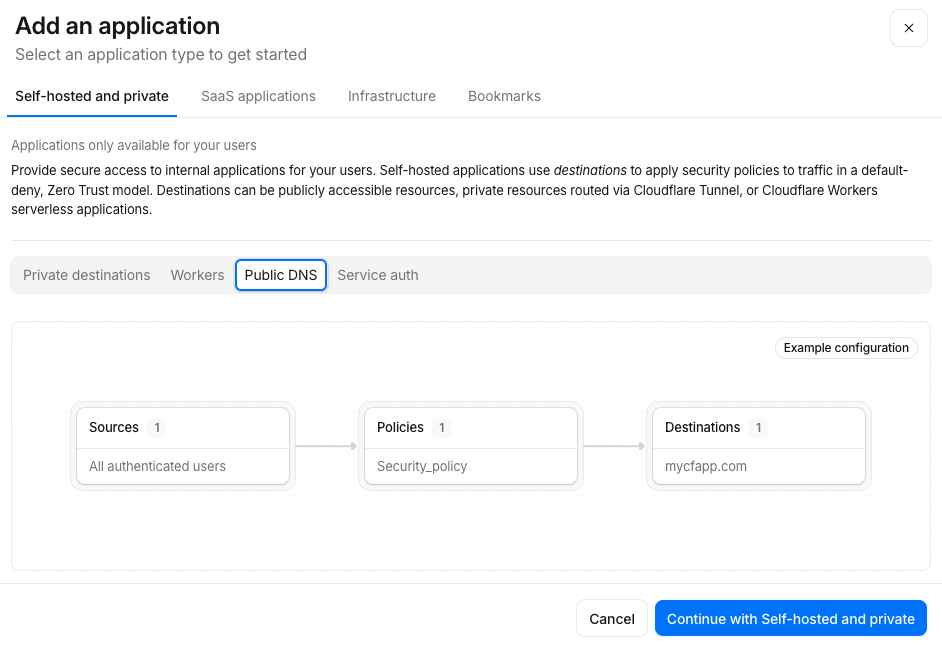
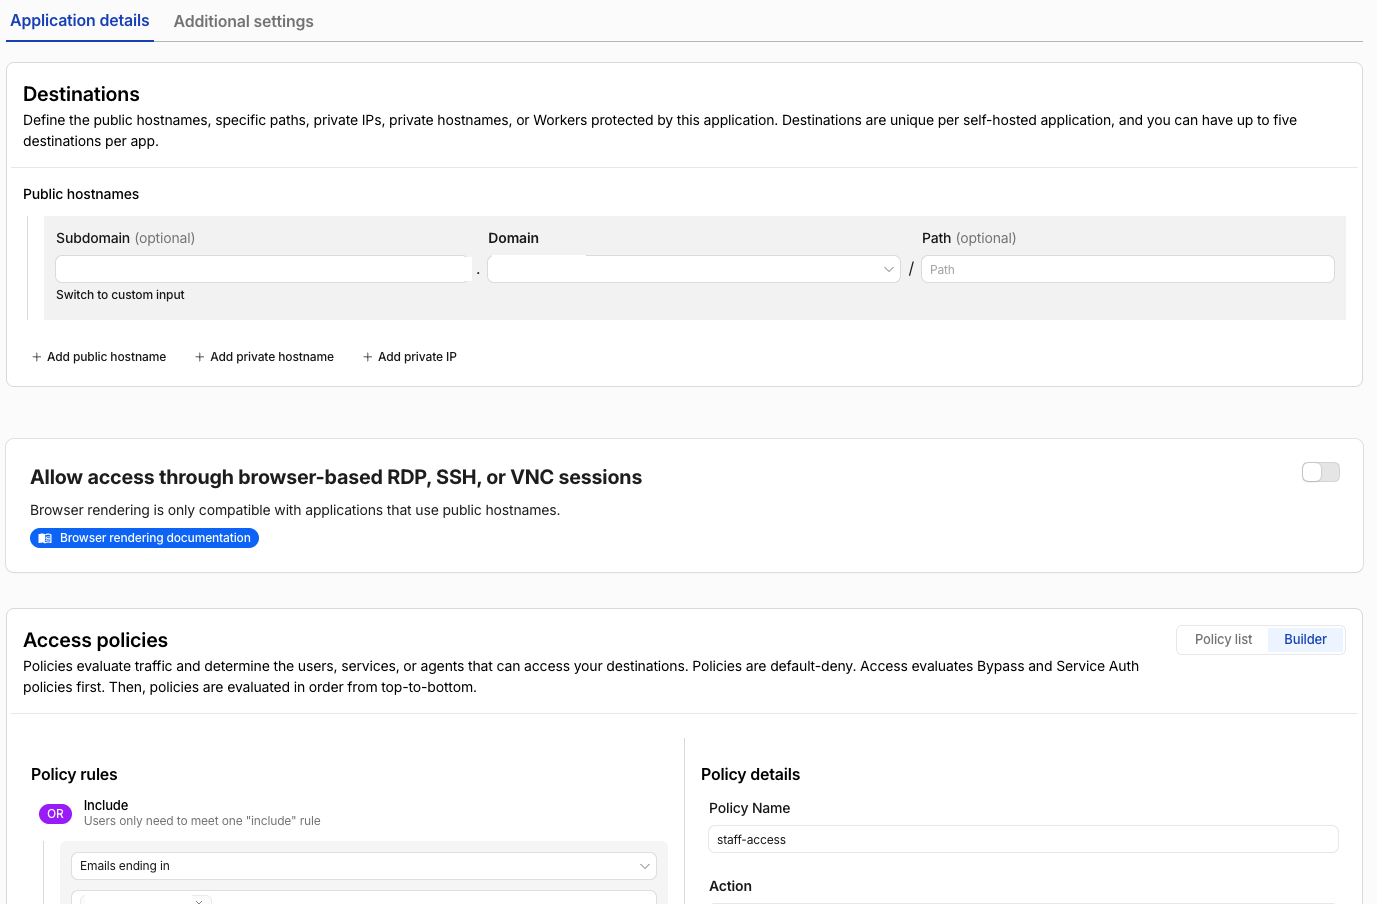
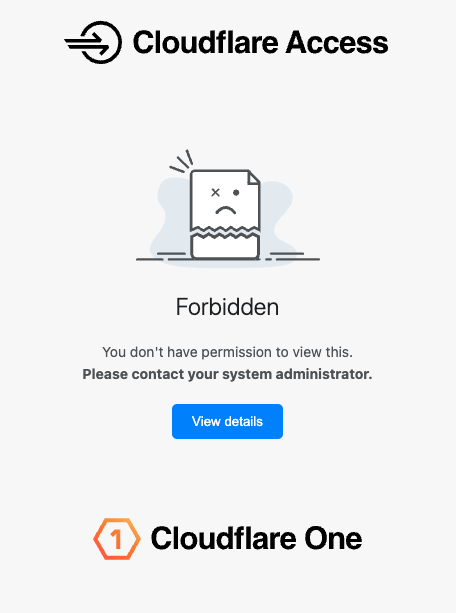
<?xml version="1.0" encoding="utf-8"?><feed xmlns="http://www.w3.org/2005/Atom" xml:lang="en_US"><generator uri="https://jekyllrb.com/" version="3.10.0">Jekyll</generator><link href="https://blog.eoinclayton.com/feed.xml" rel="self" type="application/atom+xml" /><link href="https://blog.eoinclayton.com/" rel="alternate" type="text/html" hreflang="en_US" /><updated>2026-07-26T06:00:32+00:00</updated><id>https://blog.eoinclayton.com/feed.xml</id><title type="html">Technicalities 2.0</title><subtitle>Notes on software, systems, and what the docs leave out.</subtitle><author><name>Eoin Clayton</name></author><entry><title type="html">ZTN - CI/CD Testing</title><link href="https://blog.eoinclayton.com/2026/07/01/ztn-cicd-testing/" rel="alternate" type="text/html" title="ZTN - CI/CD Testing" /><published>2026-07-01T00:00:00+00:00</published><updated>2026-07-01T00:00:00+00:00</updated><id>https://blog.eoinclayton.com/2026/07/01/ztn-cicd-testing</id><content type="html" xml:base="https://blog.eoinclayton.com/2026/07/01/ztn-cicd-testing/"><![CDATA[<p>In the previous Zero Trust Networking (ZTN) posts, we explored how we can add security to secure sensitive areas of your website. We saw how we can require users to auth via an identity provider, and how we can require users to be on authorised devices.</p>

<p>Where does that leave your CI/CD build and deployment system though? I typically run Postman/Newman/Bruno API tests and Playwright UI tests as part of my builds. How will Github Actions, for example, auth itself as a user or how can we auth the Github Actions hosted runner as being an authorised device?</p>

<p>The answer is to put in place “Service Credentials”.</p>

<h2 id="setup-a-service-credential">Setup a Service Credential</h2>
<ol>
  <li>Navigate to Access Controls -&gt; Service Credentials and add a service token <img src="/assets/images/pasted-image-20260705113650.png" alt="Cloudflare Access Service Credentials page with Add a service token button" /></li>
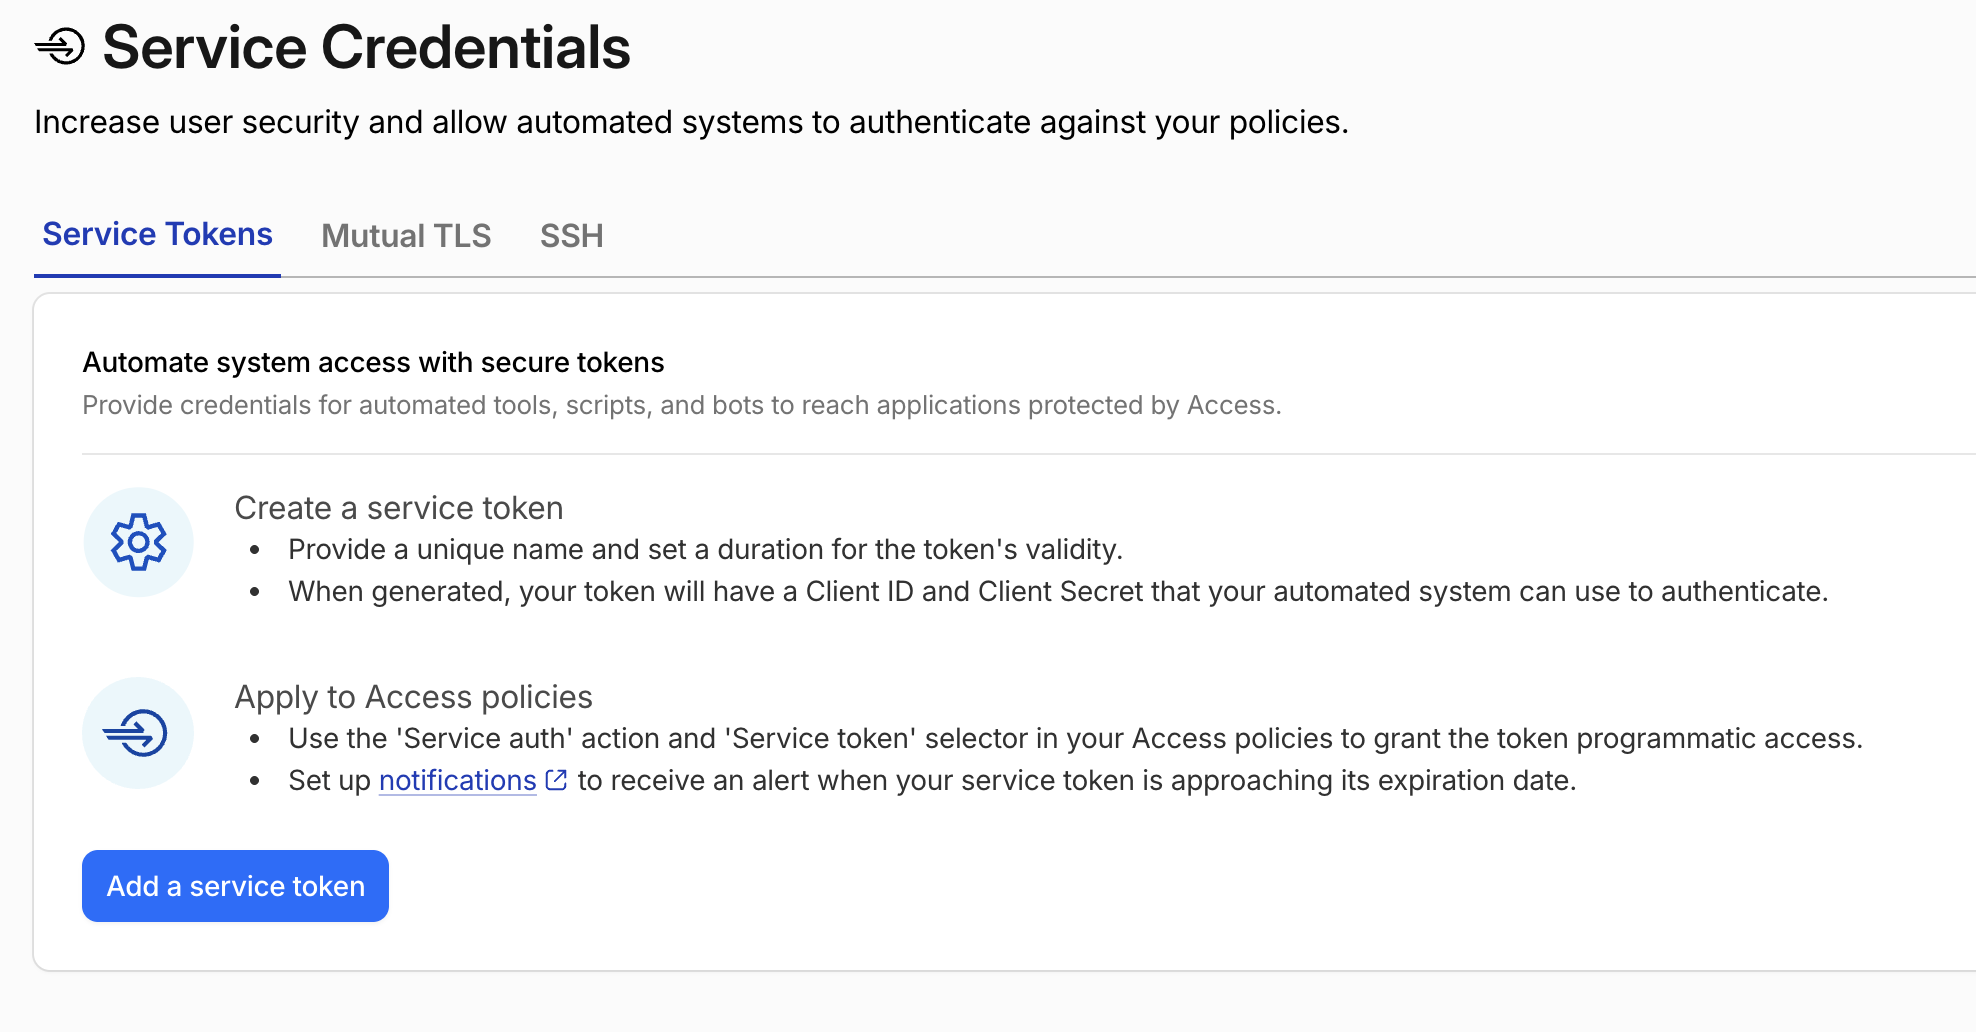
  <li>Give the token an appropriate name and generate the token <img src="/assets/images/pasted-image-20260705113710.png" alt="Cloudflare form for naming and generating a new service token" /></li>
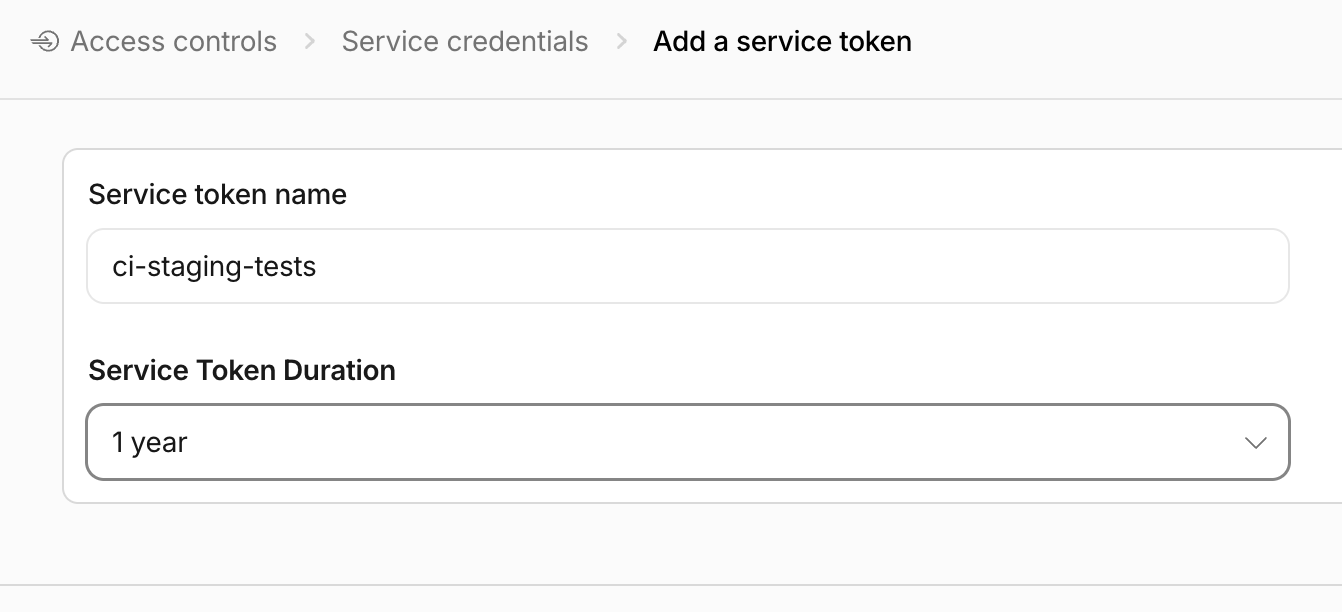
  <li>Save the Client Id and Client Secret securely! Once you navigate away, you won’t be able to see it again and will have to regenerate it</li>
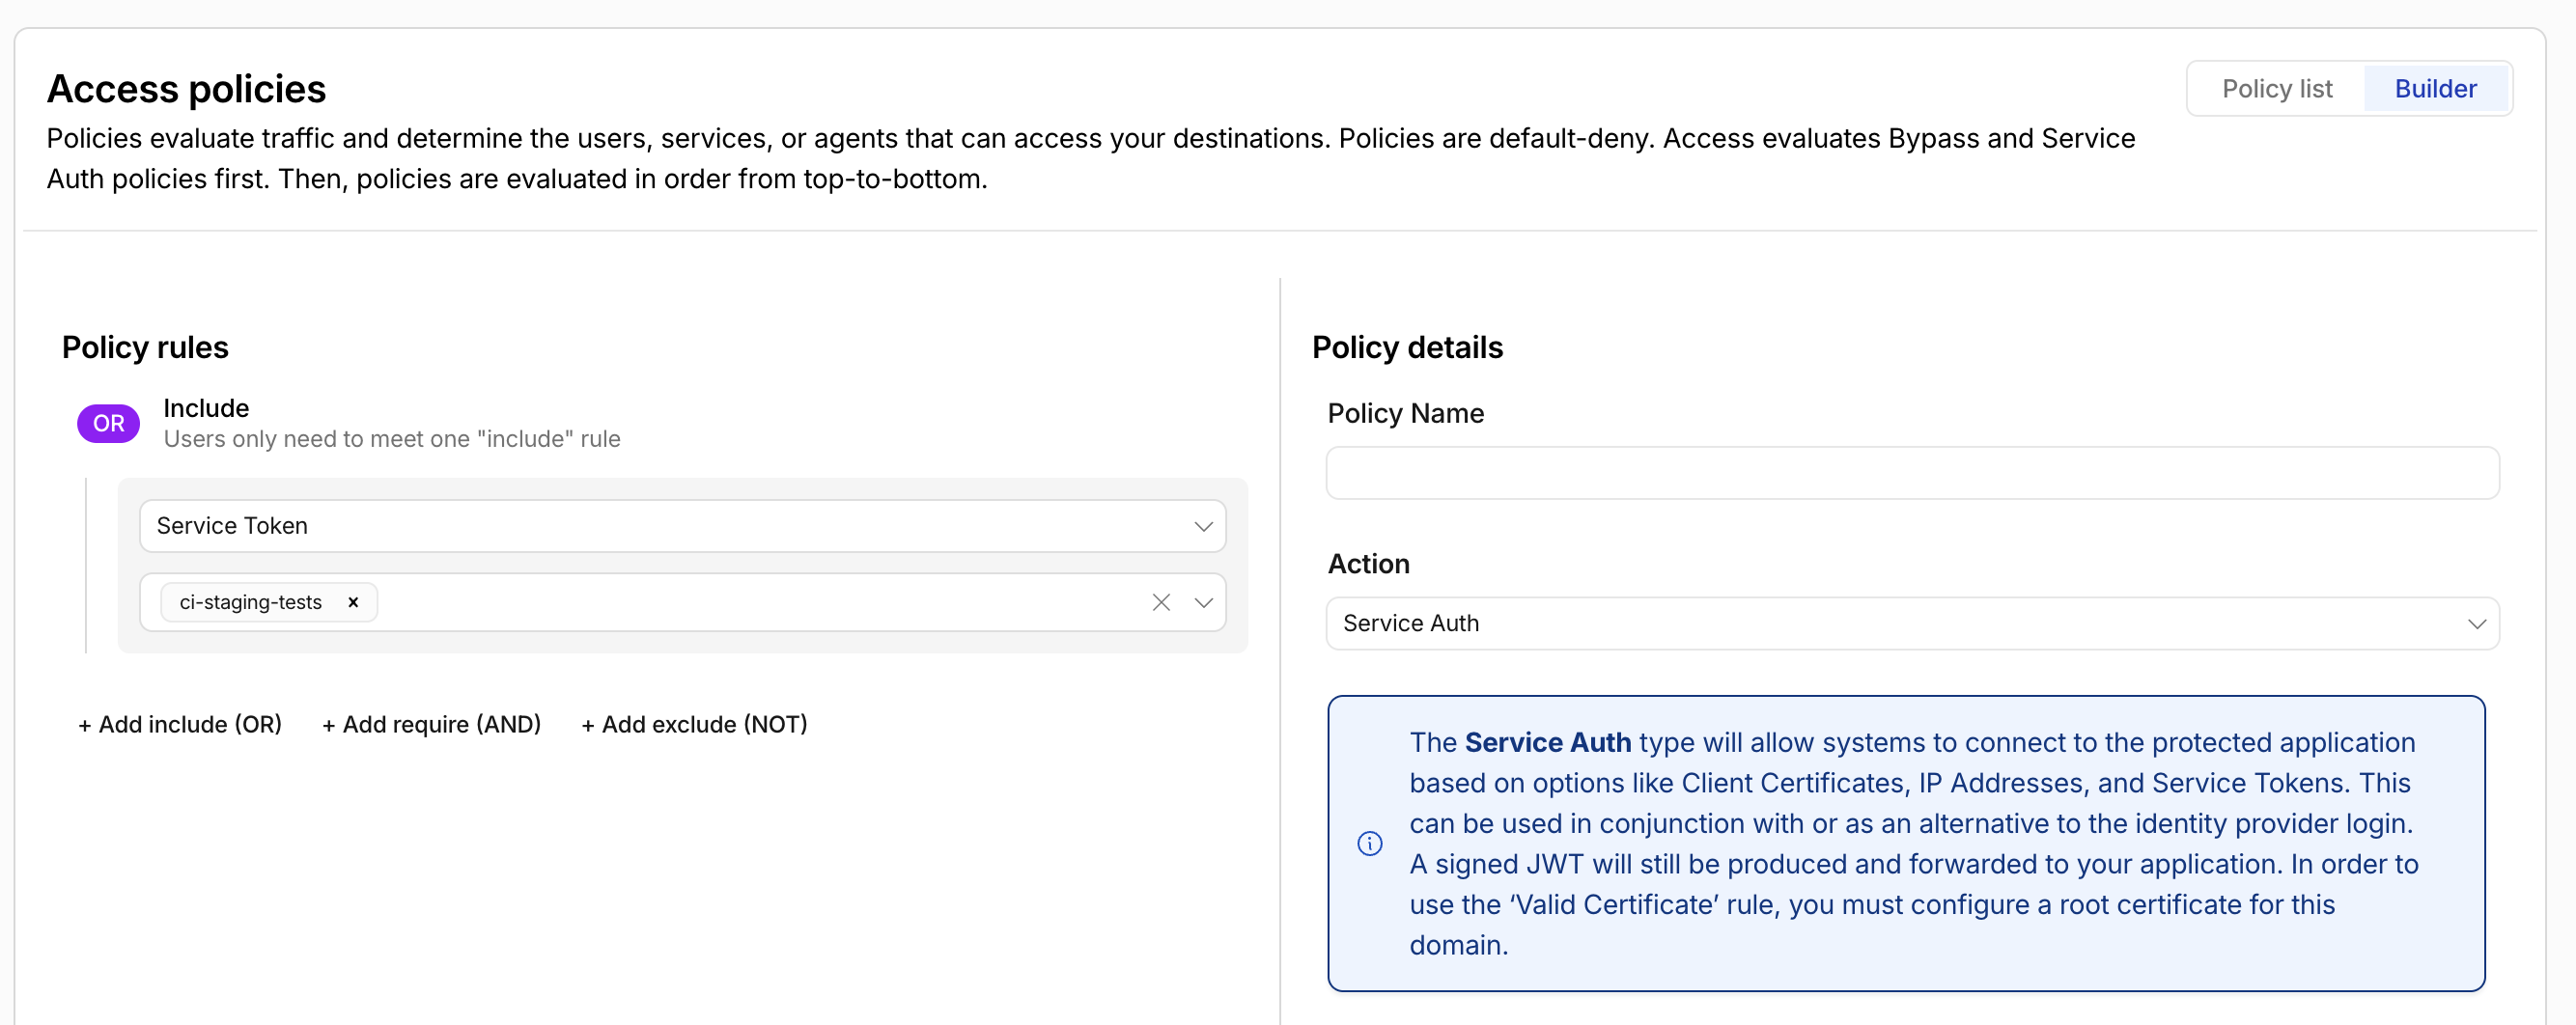
  <li>Navigate to Access Controls -&gt; Applications, click in to your application and add a second policy. Include the Service Token that you just created, and make the Action be “Service Auth” <img src="/assets/images/pasted-image-20260705113729.png" alt="Cloudflare Access policy configured with Service Auth action using the new service token" /></li>
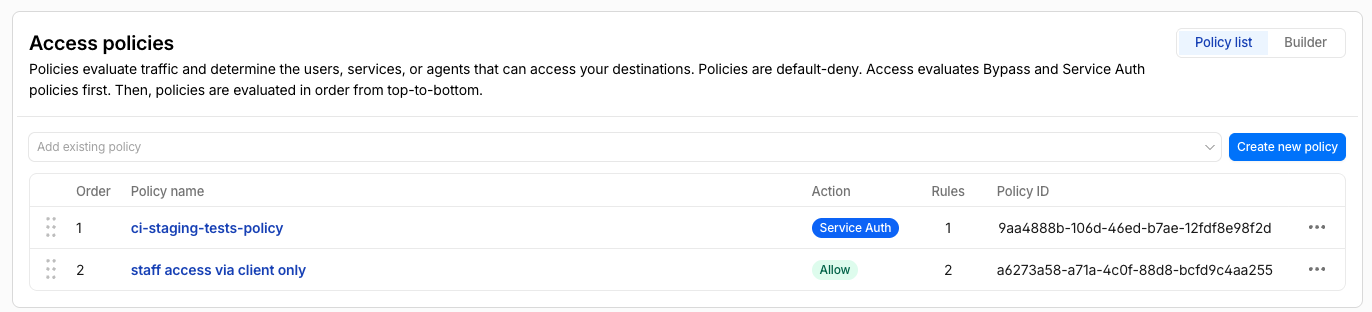
  <li>Save the new policy and save the application. You should then have at least two policies: one for the CI/CD system (Service Auth) and one for staff/human use. Note: the order doesn’t matter for Service Auth policies: Cloudflare treats Service Auth policies as higher priority than other policy types <img src="/assets/images/pasted-image-20260705114048.png" alt="Cloudflare Access application showing both a Service Auth policy and a staff login policy" /></li>
</ol>

<h2 id="configure-your-cicd-runner">Configure your CI/CD runner</h2>
<p>I use Github Actions for the CI/CD flow these days. Your CI/CD runner will follow a similar approach.</p>

<p>For Github Actions, in your repo navigate to Settings -&gt; Secrets and variables -&gt; Actions and add the following to Repository Secrets, using the values you saved previously:</p>

<ol>
  <li>CF_ACCESS_CLIENT_ID</li>
  <li>CF_ACCESS_CLIENT_SECRET</li>
</ol>

<h2 id="newmanpostman">Newman/Postman</h2>
<ol>
  <li>
    <p>Add a pre-request script at the collection level to inject the CF_ACCESS_CLIENT_ID and CF_ACCESS_CLIENT_SECRET secrets into each API test call:</p>

    <div class="language-javascript highlighter-rouge"><div class="highlight"><pre class="highlight"><code><span class="kd">const</span> <span class="nx">clientId</span> <span class="o">=</span> <span class="nx">pm</span><span class="p">.</span><span class="nx">environment</span><span class="p">.</span><span class="kd">get</span><span class="p">(</span><span class="dl">'</span><span class="s1">CF_Access_Client_Id</span><span class="dl">'</span><span class="p">);</span>
<span class="kd">const</span> <span class="nx">clientSecret</span> <span class="o">=</span> <span class="nx">pm</span><span class="p">.</span><span class="nx">environment</span><span class="p">.</span><span class="kd">get</span><span class="p">(</span><span class="dl">'</span><span class="s1">CF_Access_Client_Secret</span><span class="dl">'</span><span class="p">);</span>

<span class="c1">// Only add the credential when it's present. Local runs without the vars send</span>
<span class="c1">// nothing (e.g. authorising via the Cloudflare WARP tunnel instead); an empty,</span>
<span class="c1">// present-but-invalid header would make Access reject the request outright.</span>
<span class="k">if</span> <span class="p">(</span><span class="nx">clientId</span> <span class="o">&amp;&amp;</span> <span class="nx">clientSecret</span><span class="p">)</span> <span class="p">{</span>
  <span class="nx">pm</span><span class="p">.</span><span class="nx">request</span><span class="p">.</span><span class="nx">headers</span><span class="p">.</span><span class="nx">add</span><span class="p">({</span> <span class="na">key</span><span class="p">:</span> <span class="dl">'</span><span class="s1">CF-Access-Client-Id</span><span class="dl">'</span><span class="p">,</span> <span class="na">value</span><span class="p">:</span> <span class="nx">clientId</span> <span class="p">});</span>
  <span class="nx">pm</span><span class="p">.</span><span class="nx">request</span><span class="p">.</span><span class="nx">headers</span><span class="p">.</span><span class="nx">add</span><span class="p">({</span> <span class="na">key</span><span class="p">:</span> <span class="dl">'</span><span class="s1">CF-Access-Client-Secret</span><span class="dl">'</span><span class="p">,</span> <span class="na">value</span><span class="p">:</span> <span class="nx">clientSecret</span> <span class="p">});</span>
<span class="p">}</span>
</code></pre></div>    </div>
  </li>
  <li>
    <p>In the CI/CD workflow, invoke Newman with the secrets</p>

    <div class="language-yaml highlighter-rouge"><div class="highlight"><pre class="highlight"><code><span class="pi">-</span> <span class="na">name</span><span class="pi">:</span> <span class="s">API tests</span>
  <span class="na">run</span><span class="pi">:</span> <span class="pi">|</span>
    <span class="s">newman run collection.json \</span>
      <span class="s">-e staging.postman_environment.json \</span>
      <span class="s">--env-var "CF_Access_Client_Id=${{ secrets.CF_ACCESS_CLIENT_ID }}" \</span>
      <span class="s">--env-var "CF_Access_Client_Secret=${{ secrets.CF_ACCESS_CLIENT_SECRET }}"</span>
</code></pre></div>    </div>
  </li>
</ol>

<h2 id="bruno">Bruno</h2>
<ol>
  <li>
    <p>In the collection.bru file at the collection root, add in the headers:</p>

    <div class="language-text highlighter-rouge"><div class="highlight"><pre class="highlight"><code>headers {
  CF-Access-Client-Id: {{process.env.CF_ACCESS_CLIENT_ID}}
  CF-Access-Client-Secret: {{process.env.CF_ACCESS_CLIENT_SECRET}}
}
</code></pre></div>    </div>
  </li>
  <li>
    <p>Update your CI/CD workflow to include the secrets when you invoke Bruno</p>

    <div class="language-yaml highlighter-rouge"><div class="highlight"><pre class="highlight"><code><span class="c1"># example CI step</span>
<span class="pi">-</span> <span class="na">name</span><span class="pi">:</span> <span class="s">API tests</span>
  <span class="na">env</span><span class="pi">:</span>
    <span class="na">CF_ACCESS_CLIENT_ID</span><span class="pi">:</span>     <span class="s">${{ secrets.CF_ACCESS_CLIENT_ID }}</span>
    <span class="na">CF_ACCESS_CLIENT_SECRET</span><span class="pi">:</span> <span class="s">${{ secrets.CF_ACCESS_CLIENT_SECRET }}</span>
  <span class="na">run</span><span class="pi">:</span> <span class="s">bru run ./collection --env staging</span>
</code></pre></div>    </div>
  </li>
</ol>

<h2 id="playwright">Playwright</h2>

<blockquote>
  <p><strong>Warning</strong>
The obvious move is to add the headers globally to all calls by using extraHTTPHeaders. Don’t! It will include your secrets in calls to external providers such as Google when your page loads Google Fonts, and you will be leaking credentials.</p>
</blockquote>

<ol>
  <li>
    <p>Follow a Decorator Pattern by extending the Playwright test method. Replace “example.com” with your own api domain so that any calls to your api domain will get the headers added:</p>
    <div class="language-typescript highlighter-rouge"><div class="highlight"><pre class="highlight"><code><span class="k">import</span> <span class="p">{</span> <span class="nx">test</span> <span class="k">as</span> <span class="nx">base</span><span class="p">,</span> <span class="nx">expect</span> <span class="p">}</span> <span class="k">from</span> <span class="dl">'</span><span class="s1">@playwright/test</span><span class="dl">'</span><span class="p">;</span>

<span class="kd">const</span> <span class="nx">clientId</span> <span class="o">=</span> <span class="nx">process</span><span class="p">.</span><span class="nx">env</span><span class="p">.</span><span class="nx">CF_ACCESS_CLIENT_ID</span><span class="p">;</span>
<span class="kd">const</span> <span class="nx">clientSecret</span> <span class="o">=</span> <span class="nx">process</span><span class="p">.</span><span class="nx">env</span><span class="p">.</span><span class="nx">CF_ACCESS_CLIENT_SECRET</span><span class="p">;</span>

<span class="k">export</span> <span class="kd">const</span> <span class="nx">test</span> <span class="o">=</span> <span class="nx">base</span><span class="p">.</span><span class="nx">extend</span><span class="p">({</span>
  <span class="na">context</span><span class="p">:</span> <span class="k">async</span> <span class="p">({</span> <span class="nx">context</span> <span class="p">},</span> <span class="nx">use</span><span class="p">)</span> <span class="o">=&gt;</span> <span class="p">{</span>
    <span class="c1">// Only attach the credential to our own (gated) hosts</span>
    <span class="k">if</span> <span class="p">(</span><span class="nx">clientId</span> <span class="o">&amp;&amp;</span> <span class="nx">clientSecret</span><span class="p">)</span> <span class="p">{</span>
      <span class="k">await</span> <span class="nx">context</span><span class="p">.</span><span class="nx">route</span><span class="p">(</span>
        <span class="p">(</span><span class="nx">url</span><span class="p">)</span> <span class="o">=&gt;</span> <span class="nx">url</span><span class="p">.</span><span class="nx">hostname</span><span class="p">.</span><span class="nx">endsWith</span><span class="p">(</span><span class="dl">'</span><span class="s1">.example.com</span><span class="dl">'</span><span class="p">),</span>
        <span class="k">async</span> <span class="p">(</span><span class="nx">route</span><span class="p">)</span> <span class="o">=&gt;</span> <span class="p">{</span>
          <span class="k">await</span> <span class="nx">route</span><span class="p">.</span><span class="k">continue</span><span class="p">({</span>
            <span class="na">headers</span><span class="p">:</span> <span class="p">{</span>
              <span class="p">...</span><span class="nx">route</span><span class="p">.</span><span class="nx">request</span><span class="p">().</span><span class="nx">headers</span><span class="p">(),</span>
              <span class="dl">'</span><span class="s1">cf-access-client-id</span><span class="dl">'</span><span class="p">:</span> <span class="nx">clientId</span><span class="p">,</span>
              <span class="dl">'</span><span class="s1">cf-access-client-secret</span><span class="dl">'</span><span class="p">:</span> <span class="nx">clientSecret</span><span class="p">,</span>
            <span class="p">},</span>
          <span class="p">});</span>
        <span class="p">},</span>
      <span class="p">);</span>
    <span class="p">}</span>
    <span class="k">await</span> <span class="nx">use</span><span class="p">(</span><span class="nx">context</span><span class="p">);</span>
  <span class="p">},</span>
<span class="p">});</span>

<span class="k">export</span> <span class="p">{</span> <span class="nx">expect</span> <span class="p">};</span>
</code></pre></div>    </div>
  </li>
  <li>
    <p>Then, in your test fixtures, update to use your extended test method</p>
    <div class="language-typescript highlighter-rouge"><div class="highlight"><pre class="highlight"><code><span class="c1">// before</span>
<span class="k">import</span> <span class="p">{</span> <span class="nx">test</span><span class="p">,</span> <span class="nx">expect</span> <span class="p">}</span> <span class="k">from</span> <span class="dl">'</span><span class="s1">@playwright/test</span><span class="dl">'</span><span class="p">;</span>
<span class="c1">// after</span>
<span class="k">import</span> <span class="p">{</span> <span class="nx">test</span><span class="p">,</span> <span class="nx">expect</span> <span class="p">}</span> <span class="k">from</span> <span class="dl">'</span><span class="s1">./fixtures</span><span class="dl">'</span><span class="p">;</span>
</code></pre></div>    </div>
  </li>
  <li>
    <p>Update your CI/CD workflow to use the secrets</p>

    <div class="language-yaml highlighter-rouge"><div class="highlight"><pre class="highlight"><code><span class="pi">-</span> <span class="na">name</span><span class="pi">:</span> <span class="s">Playwright tests</span>
  <span class="na">env</span><span class="pi">:</span>
    <span class="na">CF_ACCESS_CLIENT_ID</span><span class="pi">:</span>     <span class="s">${{ secrets.CF_ACCESS_CLIENT_ID }}</span>
    <span class="na">CF_ACCESS_CLIENT_SECRET</span><span class="pi">:</span> <span class="s">${{ secrets.CF_ACCESS_CLIENT_SECRET }}</span>
  <span class="na">run</span><span class="pi">:</span> <span class="s">npx playwright test</span>
</code></pre></div>    </div>
  </li>
</ol>]]></content><author><name>Eoin Clayton</name></author><summary type="html"><![CDATA[How to authenticate CI/CD pipelines against a Cloudflare Zero Trust protected site using Service Credentials, with examples for Newman/Postman, Bruno, and Playwright.]]></summary></entry><entry><title type="html">ZTN: Devices</title><link href="https://blog.eoinclayton.com/2026/06/01/ztn-devices/" rel="alternate" type="text/html" title="ZTN: Devices" /><published>2026-06-01T00:00:00+00:00</published><updated>2026-06-01T00:00:00+00:00</updated><id>https://blog.eoinclayton.com/2026/06/01/ztn-devices</id><content type="html" xml:base="https://blog.eoinclayton.com/2026/06/01/ztn-devices/"><![CDATA[<p>In the previous Zero Trust Networking (ZTN) post, we saw how we can secure a website or even part of a website. Let’s take it to the next level and require users to be on approved devices.
Only those users on company laptops (or your home laptop if you are an indie dev) will then be allowed to access the secured resources.</p>

<h2 id="the-next-level-auto-auth-for-trusted-devices">The next level: auto-auth for trusted devices</h2>
<ol>
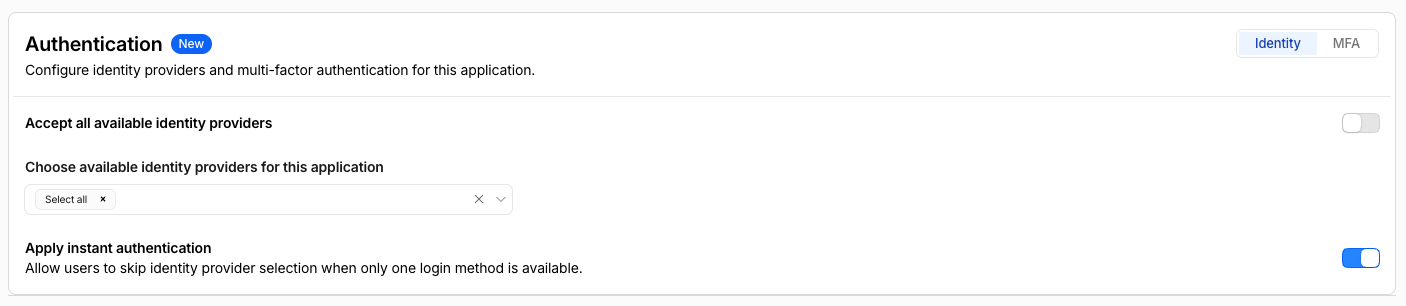
  <li>In the Zero Trust area, Access Controls -&gt; Access Settings and activate Enable authentication using Cloudflare One <img src="/assets/images/pasted-image-20260705112017.png" alt="Cloudflare Zero Trust Access Settings with Cloudflare One authentication enabled" /></li>
  <li>Go to your application in Access Controls -&gt; Applications and enable Authenticate with Cloudflare One Client <img src="/assets/images/pasted-image-20260705112030.png" alt="Cloudflare Access application setting to authenticate with the Cloudflare One Client" /></li>
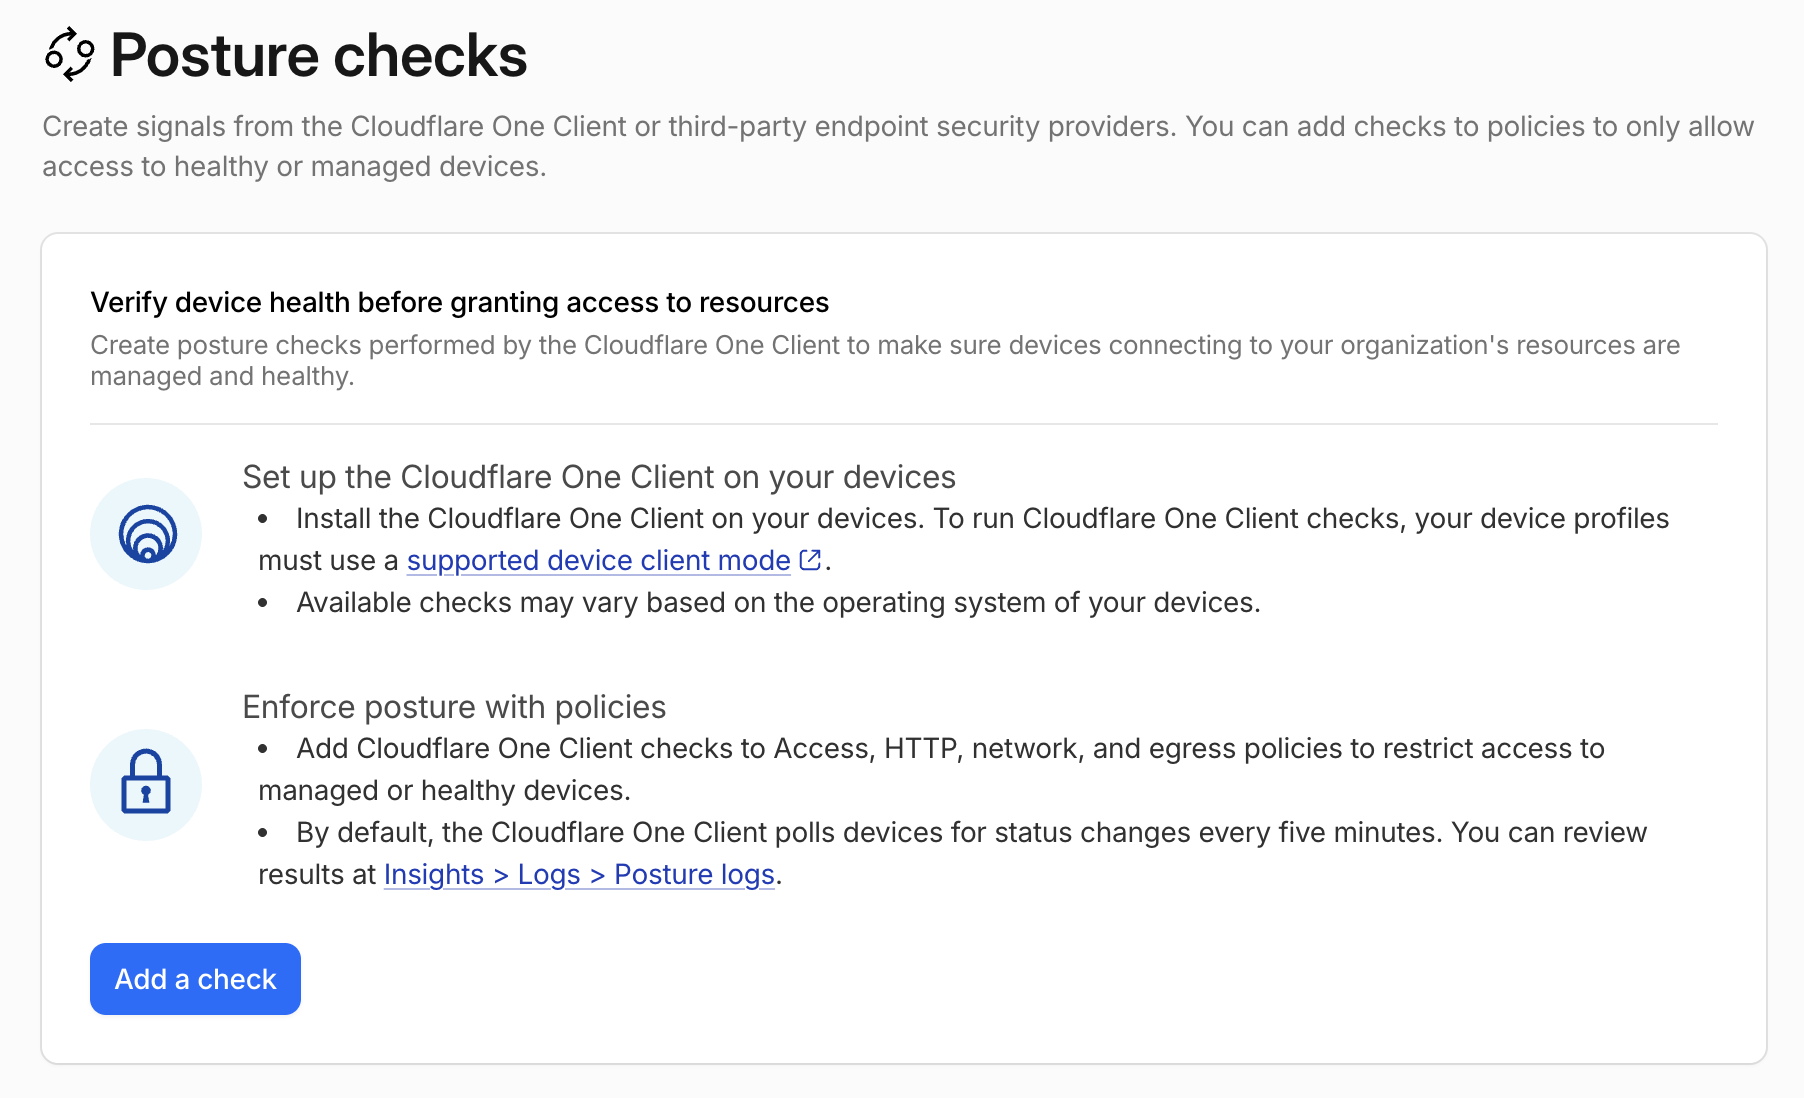
  <li>Next, add a “Device Posture” for Clients. This will enable users to login to your application with their logged in Cloudflare One Client. Go to Reusable Components -&gt; Posture Checks <img src="/assets/images/pasted-image-20260705112405.png" alt="Cloudflare Zero Trust Posture Checks configuration page" /></li>
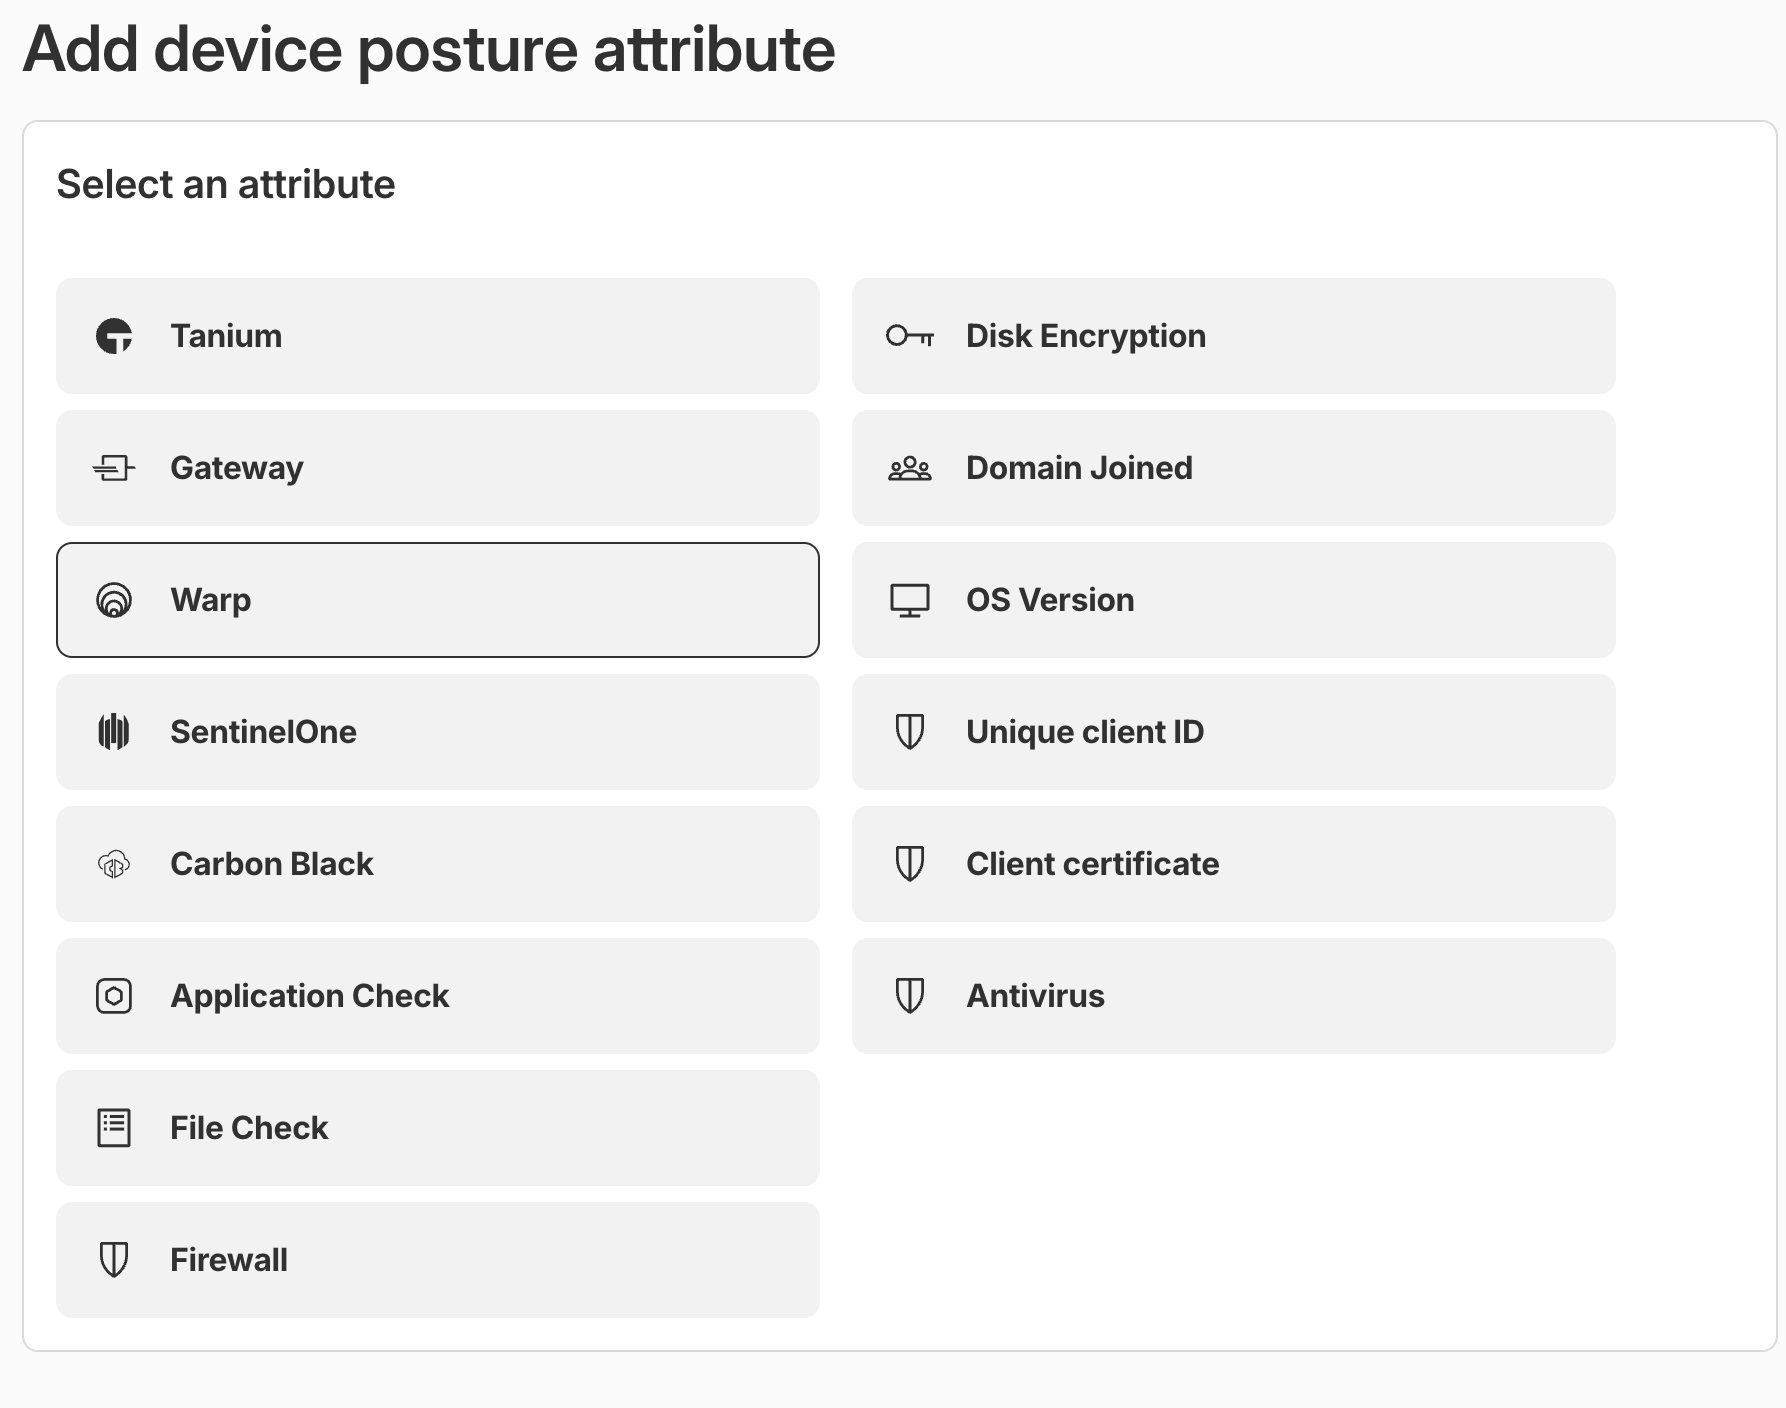
  <li>… and add a device posture check for Warp <img src="/assets/images/pasted-image-20260705112417.png" alt="Adding a WARP device posture check in Cloudflare Zero Trust" /></li>
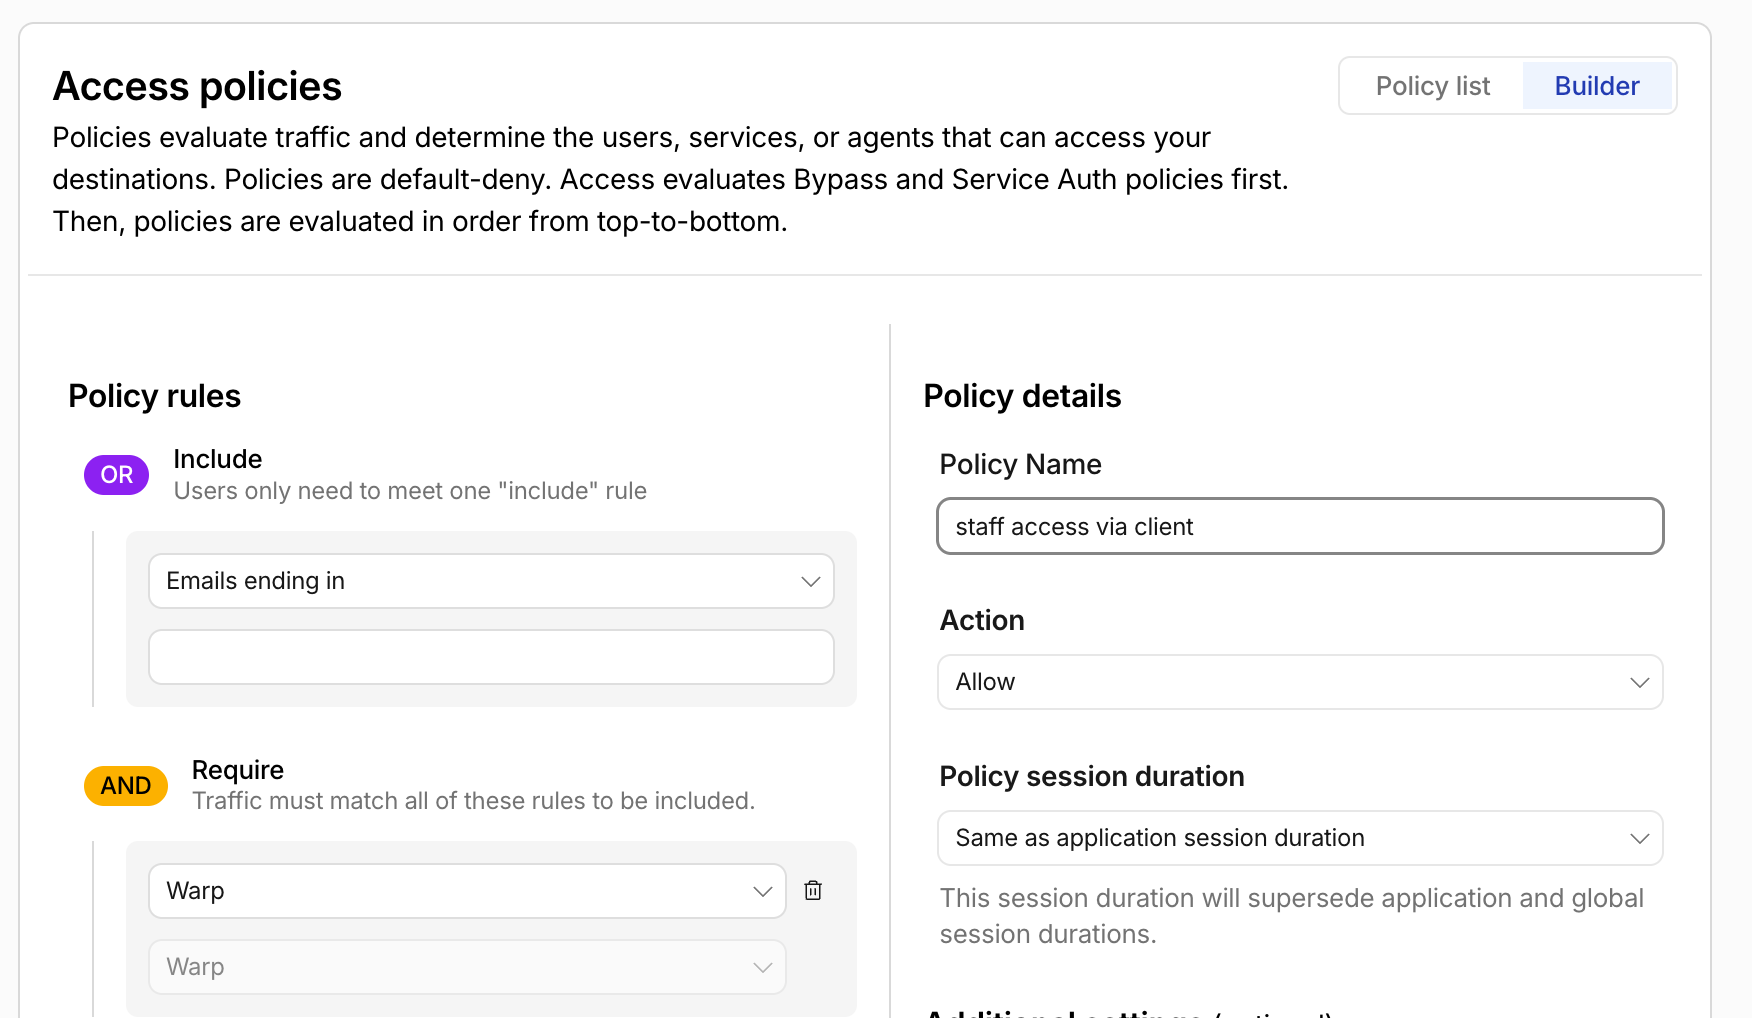
  <li>Next, add a new policy to your application so that users must have the Client installed and be logged in. Go to Access Controls -&gt; Applications and add the policy <img src="/assets/images/pasted-image-20260705112447.png" alt="Cloudflare Access policy requiring the WARP client to be installed and logged in" /></li>
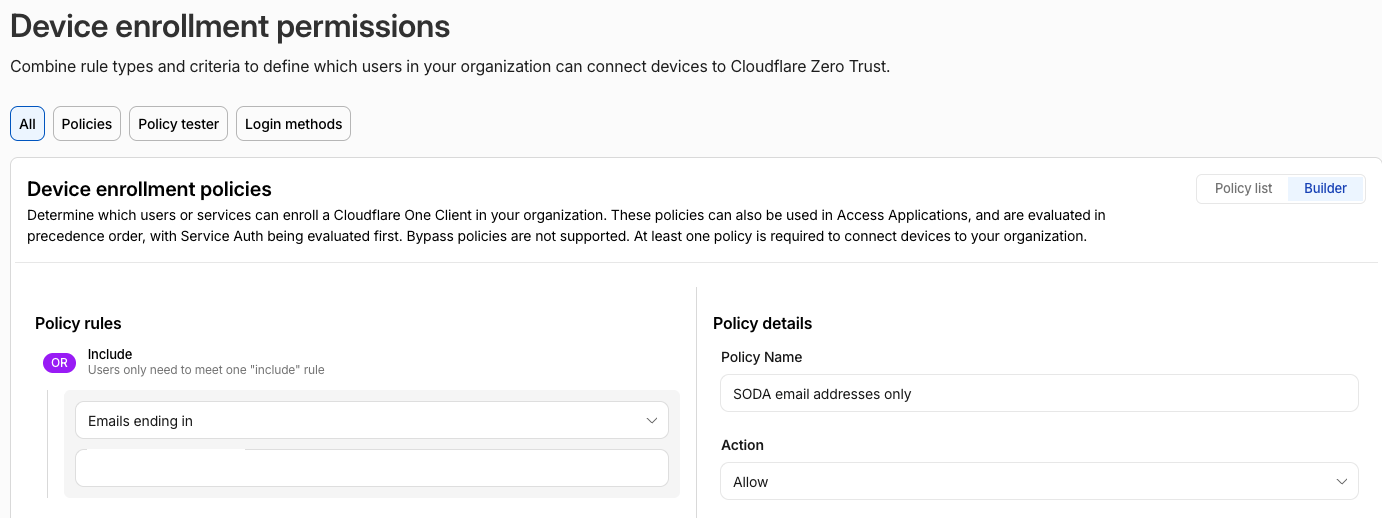
  <li>Next, make it so that users must be part of your email domain to enroll their device. We don’t want random users enrolling themselves. Devices -&gt; Management -&gt; Device enrolment permissions -&gt; Manage. Add a Policy to restrict to your email domain only <img src="/assets/images/pasted-image-20260705112530.png" alt="Cloudflare device enrolment permissions restricted to a specific email domain" /></li>
  <li>… and for further peace of mind, restrict authentication to your configured identity provider only <img src="/assets/images/pasted-image-20260705112542.png" alt="Cloudflare device enrolment restricted to a specific identity provider" /></li>
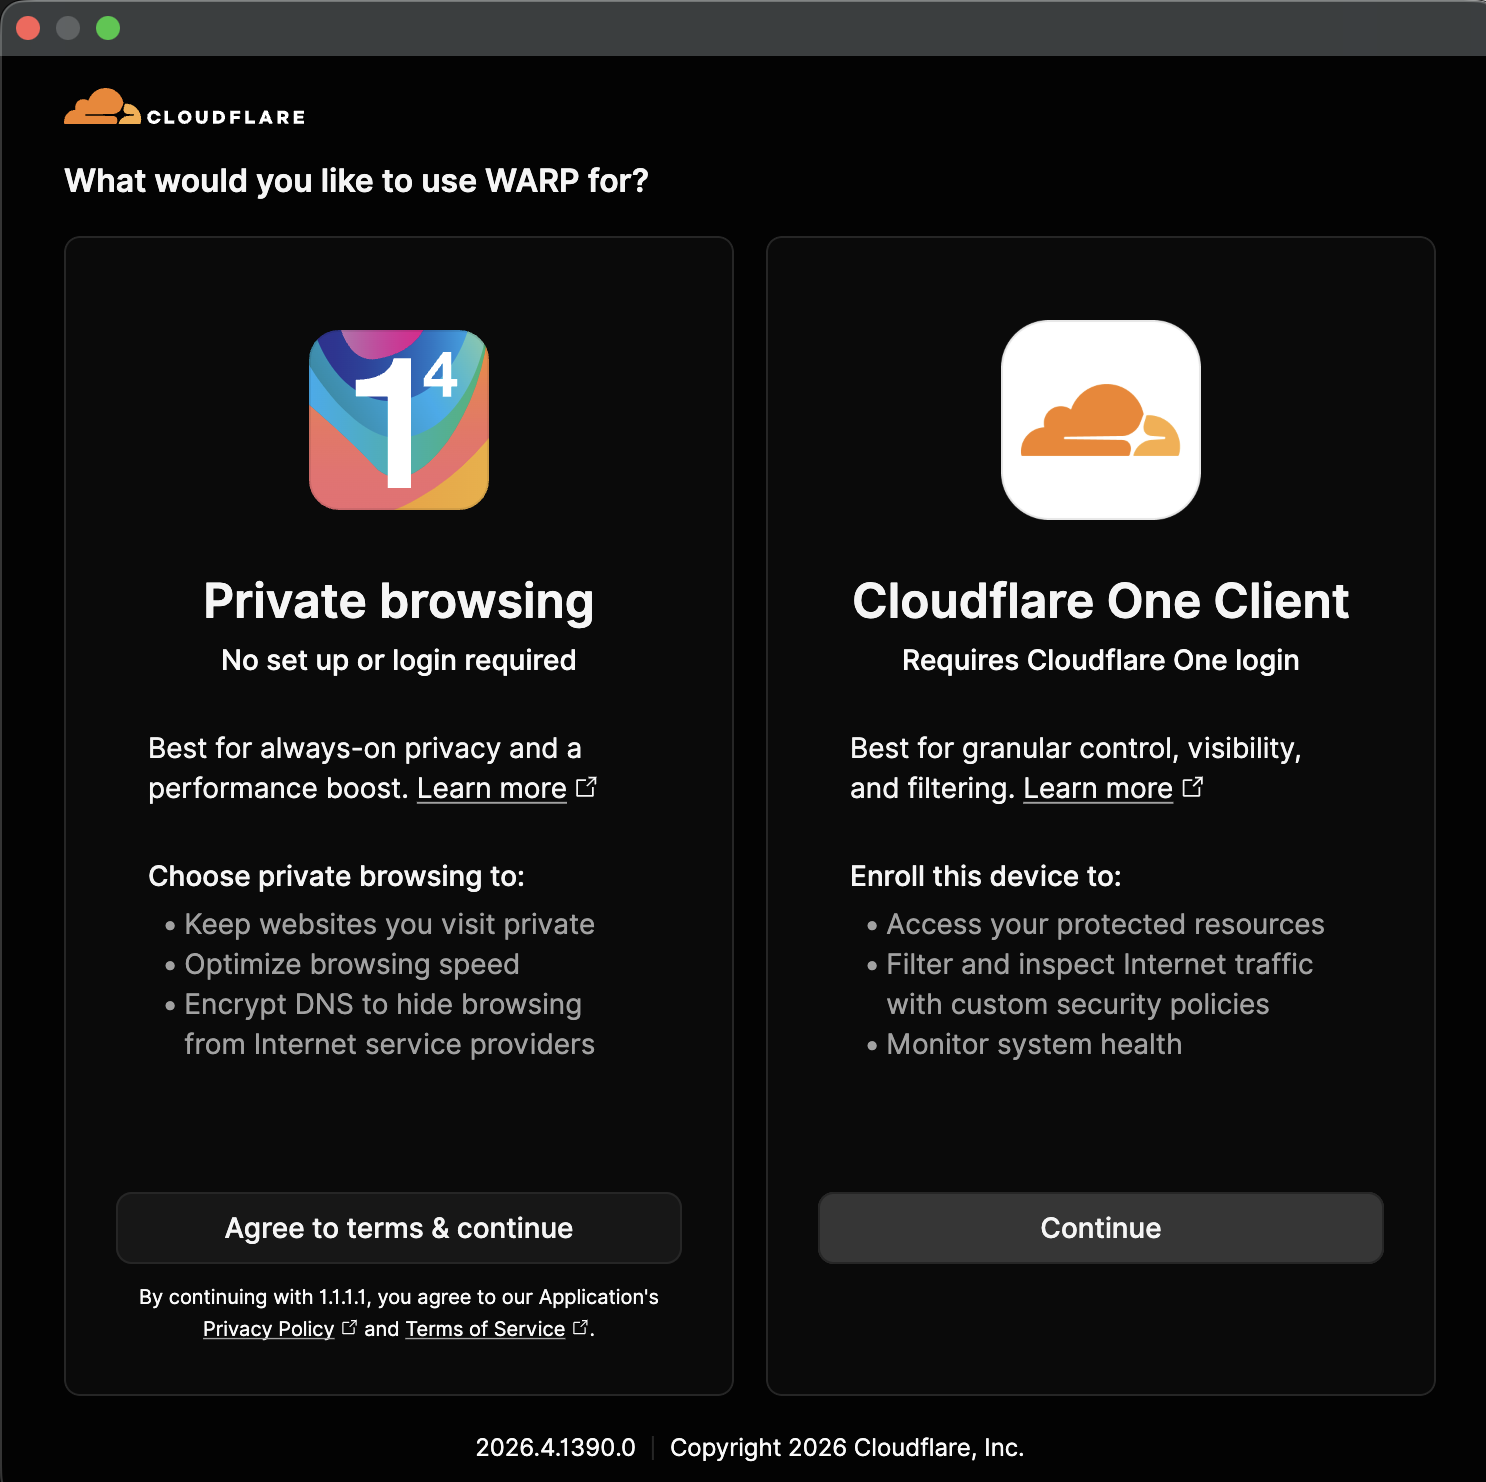
  <li>Install the Cloudflare One Client
    <ol>
      <li>Go to Settings -&gt; Downloads and download the latest release for your computer <img src="/assets/images/pasted-image-20260705112556.png" alt="Cloudflare Zero Trust downloads page for the Cloudflare One Client" /></li>
      <li>Follow the setup guide by choosing Cloudflare One Client <img src="/assets/images/pasted-image-20260705112605.png" alt="Cloudflare One Client setup guide selection screen" /></li>
      <li>It will ask you to login to your team, it will send you a one time pin and once you login, the Client is ready to go: <img src="/assets/images/pasted-image-20260705112615.png" alt="Cloudflare One Client showing a successful team login" /></li>
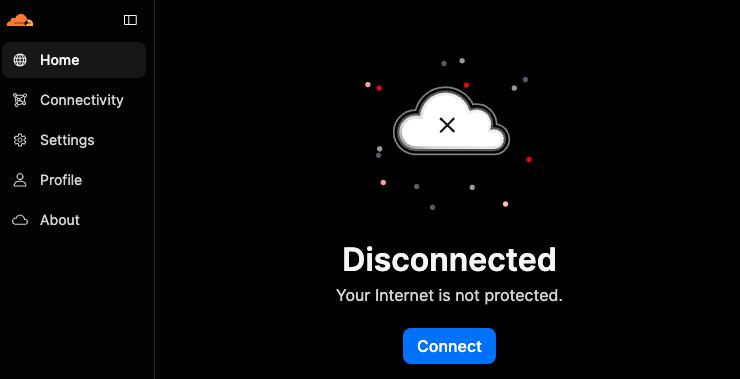
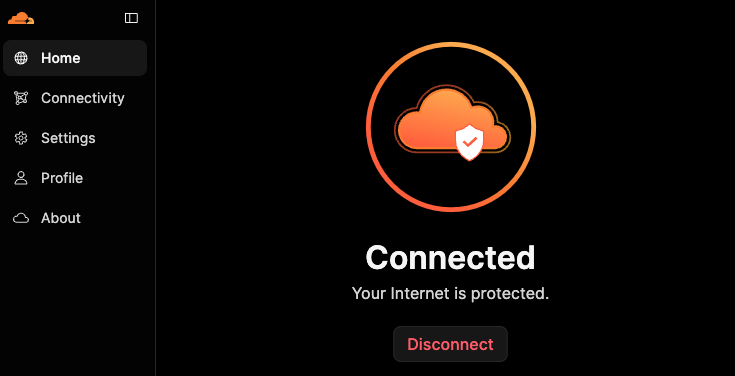
      <li>Just hit connect when you want to connect to your secure website <img src="/assets/images/pasted-image-20260705112626.png" alt="Cloudflare One Client connect button" /></li>
      <li>Best go to Devices on the web portal and verify your device appears</li>
    </ol>
  </li>
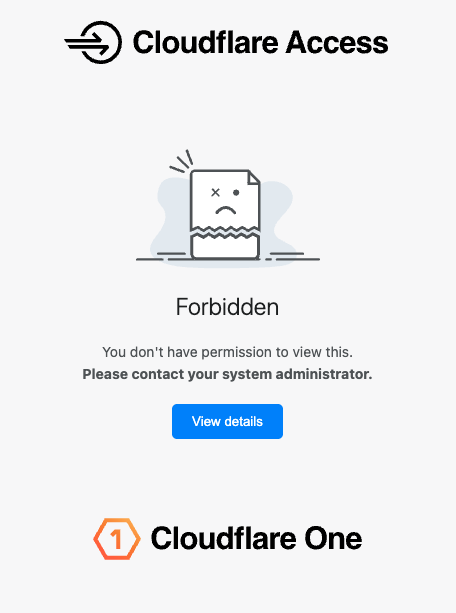
  <li>Then, when your client is disconnected, try to hit your website. You should see something similar to the following: <img src="/assets/images/pasted-image-20260705112646.png" alt="Access denied message shown when the Cloudflare One Client is disconnected" /></li>
  <li>Try to connect your client. You should end up on your website!</li>
</ol>]]></content><author><name>Eoin Clayton</name></author><summary type="html"><![CDATA[How to restrict Cloudflare Zero Trust access to only approved devices using the Cloudflare One Client and device posture checks.]]></summary></entry><entry><title type="html">Zero Trust Networking (ZTN)</title><link href="https://blog.eoinclayton.com/2026/05/01/zero-trust-networking-ztn/" rel="alternate" type="text/html" title="Zero Trust Networking (ZTN)" /><published>2026-05-01T00:00:00+00:00</published><updated>2026-05-01T00:00:00+00:00</updated><id>https://blog.eoinclayton.com/2026/05/01/zero-trust-networking-ztn</id><content type="html" xml:base="https://blog.eoinclayton.com/2026/05/01/zero-trust-networking-ztn/"><![CDATA[<p>Zero Trust Networking (ZTN) is a cybersecurity framework built on the principle of “never trust, always verify”. Unlike legacy castle-and-moat models, it assumes attackers are already inside the network. It authenticates, authorises, and continuously validates every user, device, and application before granting access to resources.</p>
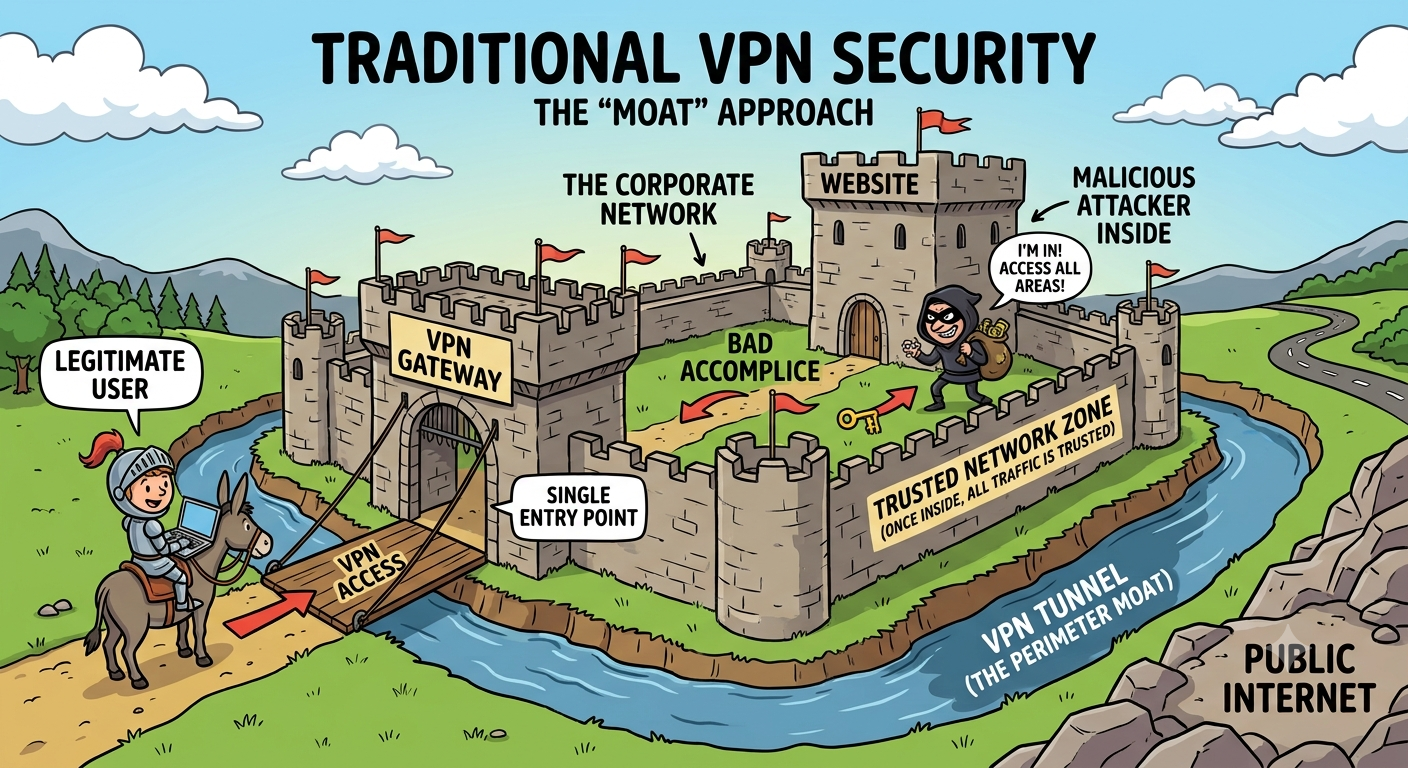
<h2 id="what-did-the-older-vpn-based-security-model-look-like">What did the older VPN based security model look like?</h2>
<p>With the older VPN approach, you put in place a strong perimeter to try to stop attackers getting into your systems. However, if an attacker found a weak spot somewhere they would be inside the perimeter: <img src="/assets/images/pasted-image-20260705110120.png" alt="Diagram of a legacy perimeter security model with a single trusted boundary" /></p>
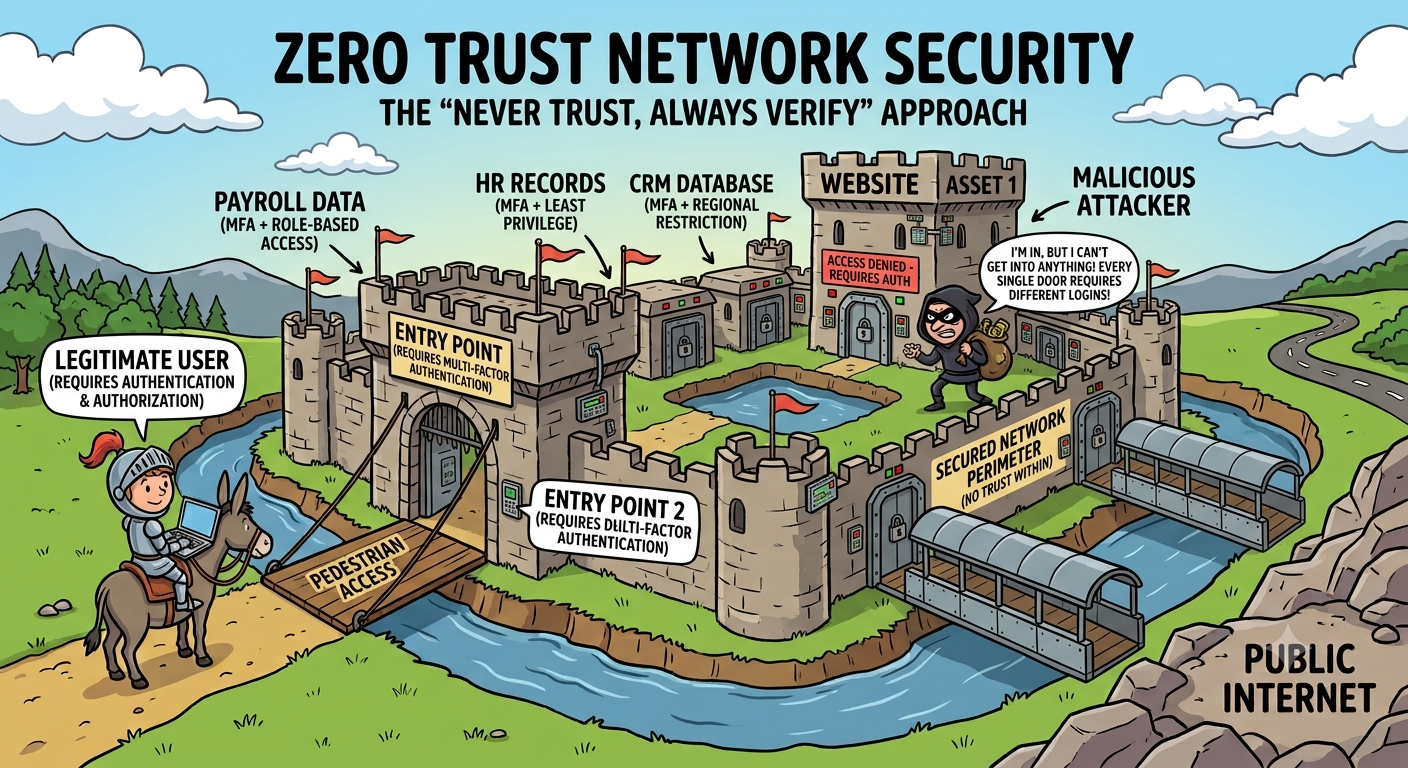
<h2 id="how-is-zero-trust-networking-different">How is Zero Trust Networking different?</h2>
<p>You can still have a perimeter, but with ZTN you don’t require or trust that perimeter anymore. You instead put a perimeter on everything, adopting a “zero trust” mindset, trusting no-one. Every time a user wants to access an internal system, the user is verified to make sure they have access: <img src="/assets/images/pasted-image-20260705110135.png" alt="Diagram of a zero trust model verifying every access request individually" /></p>
<h2 id="what-does-that-mean-in-practice">What does that mean in practice?</h2>
<p>You no longer need a VPN or extensive networking experience.
You can also secure a website, or even part of a website on the internet.</p>

<p>E.g. you can secure:</p>
<ul>
  <li>a staging website that you don’t want random users to find</li>
  <li>a prod Admin website that should only be for company staff use</li>
  <li>parts of your website/API that should only be for your use, e.g. /admin/*</li>
</ul>

<p>It’s much more flexible and the good news is that it is <a href="https://www.cloudflare.com/en-au/plans/zero-trust-services/">free to set up with Cloudflare</a></p>

<blockquote>
  <p><strong>Note:</strong> ZTN is an evolving space within Cloudflare. I found that the various AIs including Gemini, Claude and Copilot all gave wrong information on how to set it up. I even found Cloudflare’s own documentation was out of date. The following guide works mid-2026.</p>
</blockquote>

<h2 id="how-to-enable-in-cloudflare">How to enable in Cloudflare</h2>
<ol>
  <li>Enable Zero Trust on your account. It will ask for a credit card, but it is free to use</li>
  <li>Give your team a suitable name. It’s going to be “{something}.cloudflareaccess.com”, and the {something} name will be globally unique. E.g. “home” will probably already be taken.</li>
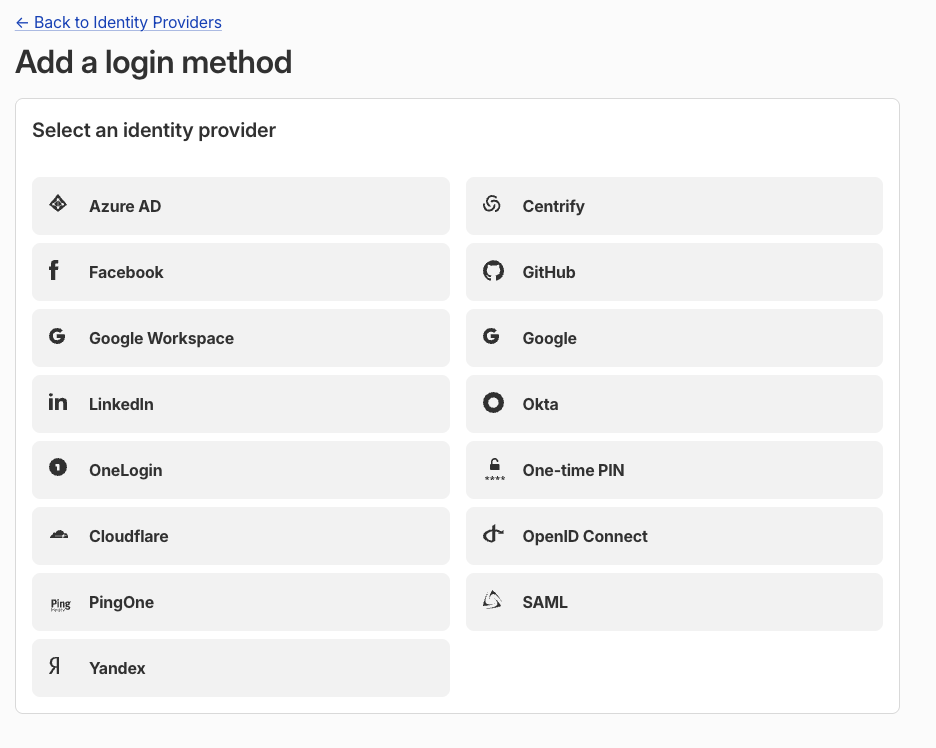
  <li>You will need an identity provider to login with. Go to Integrations -&gt; Identity Providers and add a suitable provider. You could start with the Cloudflare provided One-time PIN to get you going. Users will be sent a pin number to their email address when they hit your website <img src="/assets/images/pasted-image-20260705110223.png" alt="Cloudflare Zero Trust Identity Providers configuration screen" /></li>
  <li>In the web portal, navigate to Access Controls -&gt; Applications and Add an Application <img src="/assets/images/pasted-image-20260705110237.png" alt="Cloudflare Access Applications page with Add an Application button" /></li>
  <li>My sites are Cloudflare hosted and I went with “Self hosted” and “Public DNS” <img src="/assets/images/pasted-image-20260705110251.png" alt="Cloudflare Access application type selection: Self-hosted with Public DNS" /></li>
  <li>In the following screen, add the hostnames and add an Access Policy to restrict to the allowed logins to be your expected email, or more usefully to emails that end in your email domain <img src="/assets/images/pasted-image-20260705111419.png" alt="Cloudflare Access policy configuration restricting login by email domain" /></li>
  <li>You can also set the Session Duration to something you can live with. Too short and it will be too annoying, too long and it might be less secure <img src="/assets/images/pasted-image-20260705111445.png" alt="Cloudflare Access session duration setting" /></li>
  <li>Try to hit your site. You should be prompted to login. Users who fail to login will be blocked <img src="/assets/images/pasted-image-20260705110521.png" alt="Cloudflare Access login prompt shown when visiting the protected site" /></li>
</ol>

<blockquote>
  <p><strong>Note — Include your .pages.dev sites if you are hosting via Cloudflare</strong>
Cloudflare provides .pages.dev versions of your site. Be sure to add those to ZTN, otherwise attackers will bypass ZTN via those pages.dev versions.</p>
</blockquote>

<blockquote>
  <p><strong>Note — Terraform</strong>
As part of good practices, you should explore using <a href="https://developers.cloudflare.com/cloudflare-one/api-terraform/">Terraform to apply these settings</a>. Given how the Cloudflare documentation was out of date, I didn’t go down the Terraform route at this time but it’s on the to-do list for the future.</p>
</blockquote>]]></content><author><name>Eoin Clayton</name></author><summary type="html"><![CDATA[An introduction to Zero Trust Networking and a step-by-step guide to securing a website for free with Cloudflare Access, using an identity provider for login.]]></summary></entry><entry><title type="html">Home Battery Monitor</title><link href="https://blog.eoinclayton.com/2026/04/01/home-battery-monitor/" rel="alternate" type="text/html" title="Home Battery Monitor" /><published>2026-04-01T00:00:00+00:00</published><updated>2026-04-01T00:00:00+00:00</updated><id>https://blog.eoinclayton.com/2026/04/01/home-battery-monitor</id><content type="html" xml:base="https://blog.eoinclayton.com/2026/04/01/home-battery-monitor/"><![CDATA[<p>The Australian Government is currently (2026) providing a <a href="https://www.dcceew.gov.au/energy/programs/cheaper-home-batteries">Cheaper Home Batteries Program</a> scheme to help with home battery adoption. The more houses that install home batteries, the less pressure there will be on the electrical grid and so hopefully electricity prices will drop for all.
Using the program, we added a FoxESS home battery to the house and it has been great: we haven’t needed to draw much electricity from the grid for 4+ months and ended up supplying energy to the grid when the grid needed it. 
Now that it’s winter in Canberra, Australia (think cold and gloomy), the battery does sometimes run low and during those periods I want to know when it has run out of charge so that I can adjust my usage (e.g. avoid the dryer!).</p>

<blockquote>
  <p><strong>Note:</strong> For those who are interested in getting a battery, it looks like for us the battery will supply the house comfortably for 9+ months of the year, and then reduce the bills for winter. If your winter climate is cold and gloomy like Canberra can be, the grid will still have a use!</p>
</blockquote>

<h2 id="foxess-battery--inverter">FoxESS Battery &amp; Inverter</h2>
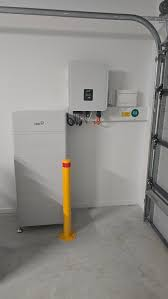
<p>A home battery comes in different shapes and sizes, depending on the manufacturer, but FoxESS batteries and inverters look something like the following:
<img src="/assets/images/homeBattery.png" alt="FoxESS home battery stack and inverter installed next to a yellow safety pole" /></p>

<p>The batteries are stacked next to the yellow safety pole, and the inverter is the smaller box above them. Similar to the Solar PV inverter discussed in <a href="/2026/01/01/solar-pv-viewer/">Solar PV Viewer</a>, the battery inverter will take the DC stored electricity and convert to AC for use by the house.</p>

<p>So: I’d like to be able to ask the inverter if the battery is empty and if so send me a notification to my phone. How will we make this happen?</p>

<h2 id="firstly-we-are-going-to-need-a-foxess-api-key">Firstly, we are going to need a FoxESS API key</h2>
<p>FoxESS has a V1 web portal here: <a href="">https://www.foxesscloud.com/login</a></p>

<blockquote>
  <p><strong>Note:</strong> You will want to use their updated V2 portal for day to day use, but for this guide we will want to login to the V1 portal to get an API token. At the time of writing this guide, getting an API key is not obvious in the V2 portal.</p>
</blockquote>

<ol>
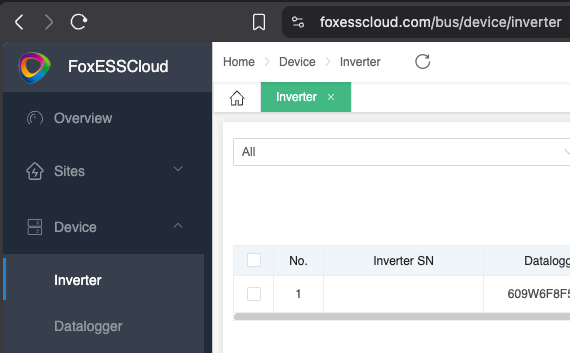
  <li>Navigate to the Inverter area and note down your Inverter SN (Serial Number):
<img src="/assets/images/foxEssInverterSerialNumber.png" alt="FoxESS Cloud inverter page showing the device serial number" /></li>
  <li>
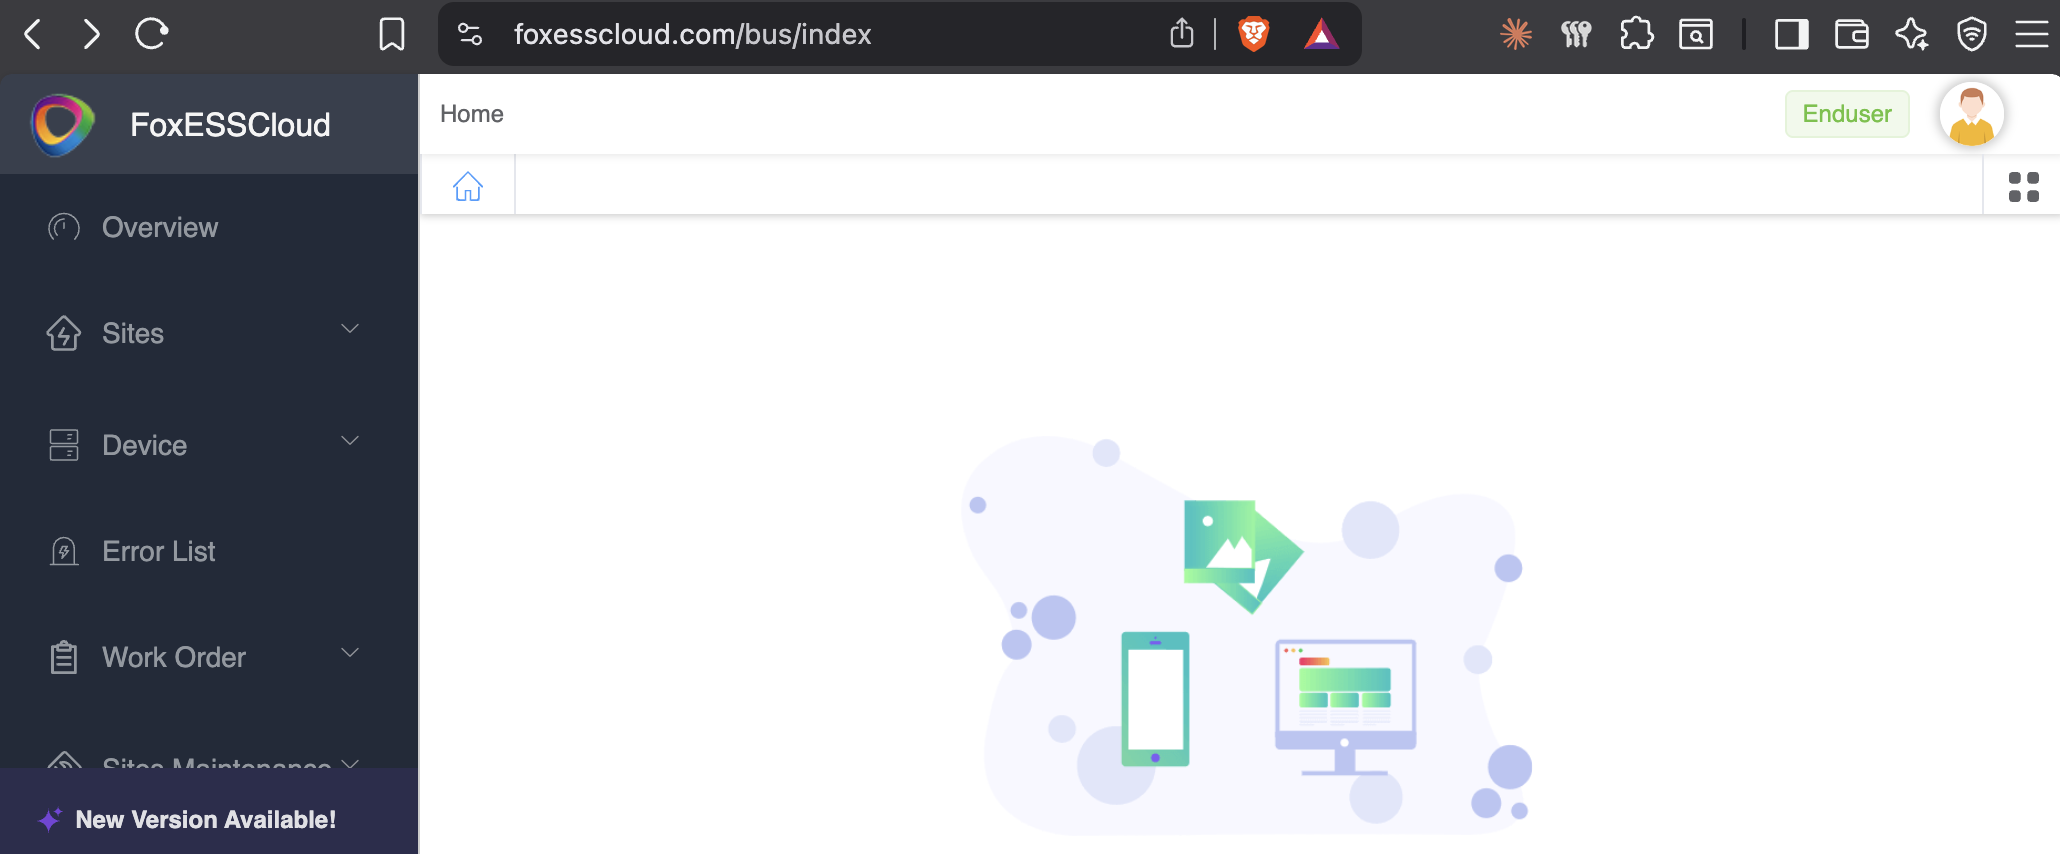
    <p>After you login, click on the Avatar at the top left:
<img src="/assets/images/foxEssCloudHomepage.png" alt="FoxESS Cloud homepage with the account avatar menu open" /></p>
  </li>
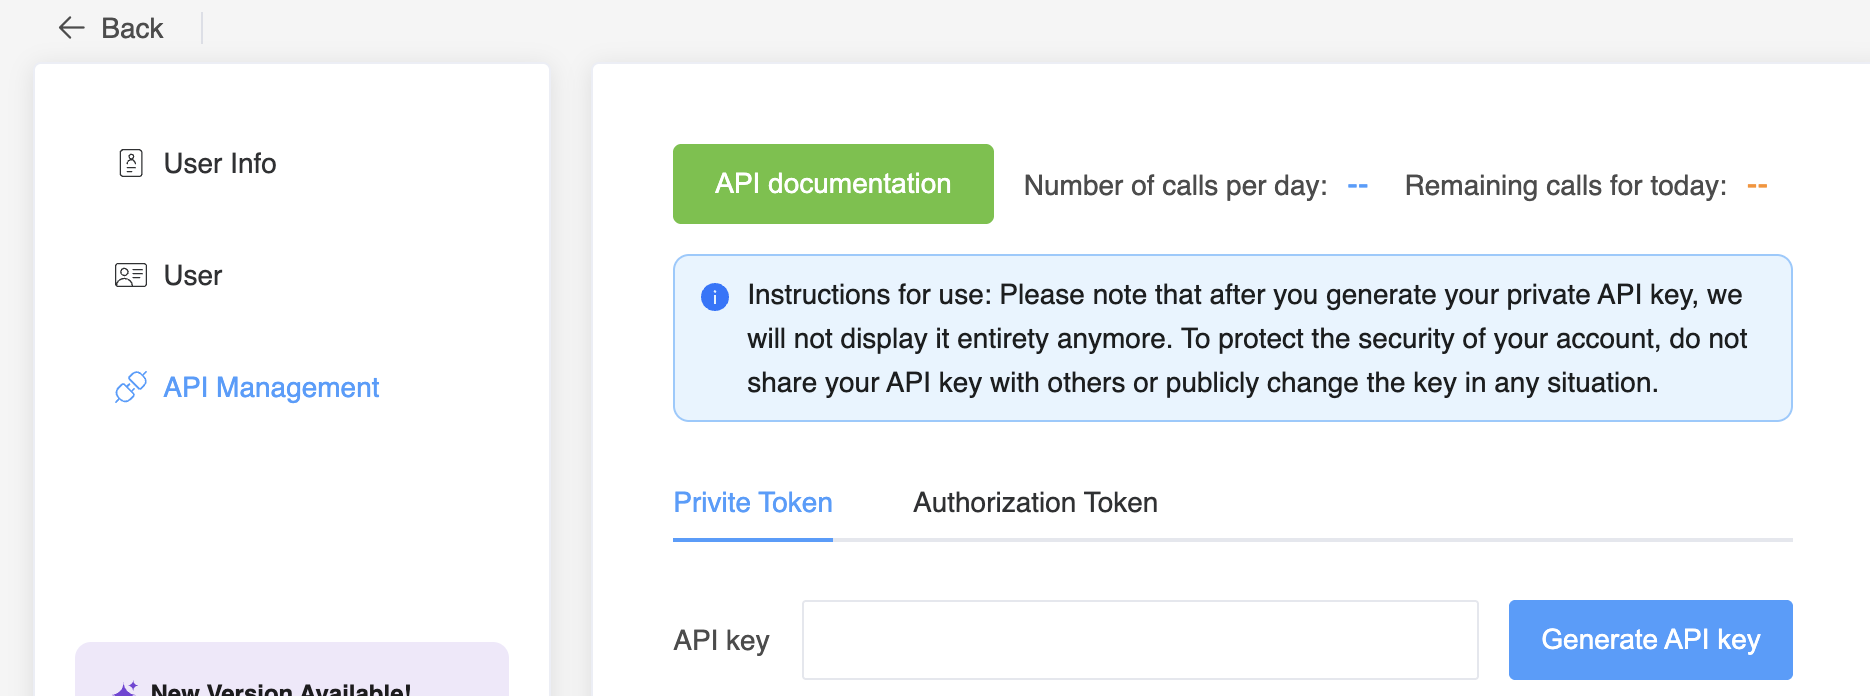
  <li>In the API Management area, click on “Generate API key” and note it down somewhere safe
<img src="/assets/images/foxEssApiKey.png" alt="FoxESS Cloud API Management page with the Generate API key button" /></li>
</ol>

<h2 id="next-how-do-you-send-a-notification-to-a-phone">Next, how do you send a notification to a phone?</h2>
<p>One of the easiest ways to send a notification to a phone is to send a Push Notification. This type of notification is linked to an app, so best to use an existing notification app that is tailor made for this purpose. I went with an old-school basic option, <a href="https://pushover.net/">PushOver</a>, but if you want something fancier you could go with <a href="https://www.pushcut.io/">PushCut</a>.</p>

<p>With PushOver, you get an API key and you also send an email to a provided email address and the message will appear on your device. 
With the API key you can send a command from your Terminal similar to:</p>

<div class="language-plaintext highlighter-rouge"><div class="highlight"><pre class="highlight"><code>curl -s \
  -F "token=APP_TOKEN" \
  -F "user=USER_KEY" \
  -F "message=LLM alert" \
  https://api.pushover.net/1/messages.json
</code></pre></div></div>

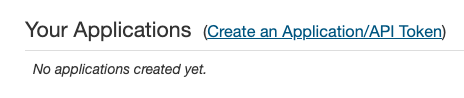
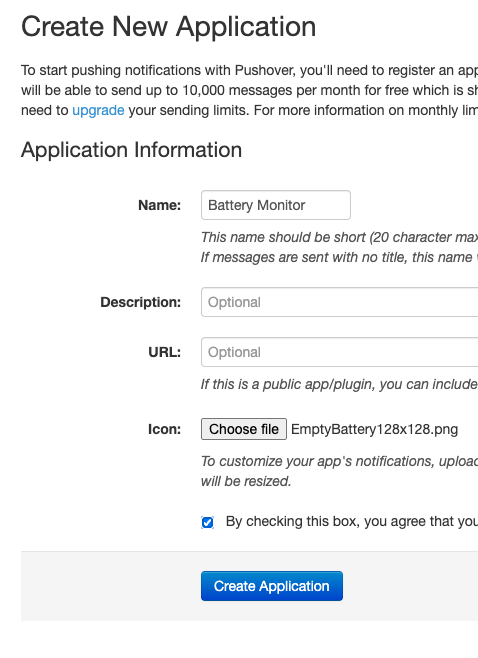
<p>You will need to create an Application in Pushover
<img src="/assets/images/pushOverApplications.png" alt="Pushover applications list in the account dashboard" /></p>

<p><img src="/assets/images/pushOverNewApplication.png" alt="Pushover create new application form" /></p>

<p>The icon I used was:
<img src="/assets/images/EmptyBattery128x128.png" alt="Empty battery icon used for the Pushover application" /></p>

<h2 id="bringing-it-together-battery-monitor-with-notification">Bringing it together: Battery Monitor with Notification</h2>
<p>Let’s go with Bash for this one.</p>

<p>.env file (replace the value placeholders with your values)</p>
<div class="language-plaintext highlighter-rouge"><div class="highlight"><pre class="highlight"><code>FOXESS_API_KEY=value
FOXESS_DEVICE_SN=value
PUSHOVER_TOKEN=value
PUSHOVER_USER=value
</code></pre></div></div>

<p>battery-alert.sh</p>
<div class="language-plaintext highlighter-rouge"><div class="highlight"><pre class="highlight"><code>#!/usr/bin/env bash

set -euo pipefail

source "$(dirname "$0")/.env"

SOC_THRESHOLD=10

foxess_query() {
   local path="$1" body="$2" ts sig
   ts=$(( $(date +%s) * 1000 ))
   sig=$(printf '%s\\r\\n%s\\r\\n%s' "$path" "$FOXESS_API_KEY" "$ts" | openssl md5 | awk '{print $NF}')

   curl -sf "https://www.foxesscloud.com${path}" \
   -H "token: $FOXESS_API_KEY" -H "timestamp: $ts" -H "signature: $sig" \
   -H "lang: en" -H "Content-Type: application/json" -d "$body"
}

echo "Running battery check for device ${FOXESS_DEVICE_SN}..."
soc=$(foxess_query "/op/v0/device/real/query" \
"{\"sn\":\"$FOXESS_DEVICE_SN\",\"variables\":[\"SoC\"]}" \
| jq '.result[0].datas[] | select(.variable=="SoC") | .value')

echo "Battery SoC: ${soc}%"
if (( $(echo "$soc &lt;= $SOC_THRESHOLD" | bc) )); then
   curl -sf https://api.pushover.net/1/messages.json \
   -d "token=$PUSHOVER_TOKEN" -d "user=$PUSHOVER_USER" \
   -d "title=Battery Low" -d "message=Home battery SoC is ${soc}%. Using the grid." &gt; /dev/null
   echo "Alert sent — SoC is at or below ${SOC_THRESHOLD}%."
else
   echo "No alert — SoC is above ${SOC_THRESHOLD}%."
fi
</code></pre></div></div>

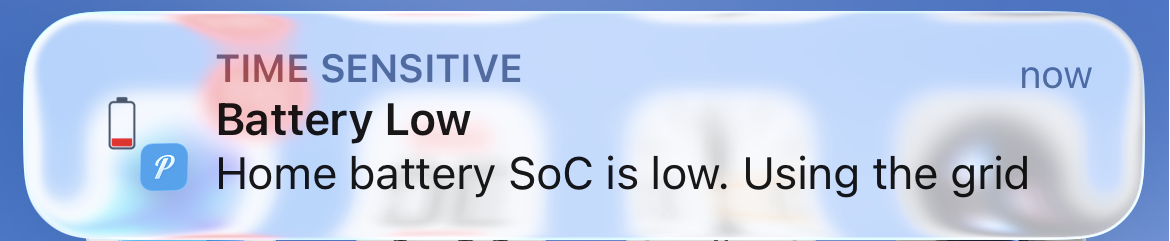
<p>You can then run the script on a schedule on your Mac and it will tell you when the battery is low.
<img src="/assets/images/pushNotificationLowBattery.png" alt="Phone push notification showing a low home battery state of charge alert" /></p>

<h2 id="optional-addition">Optional Addition</h2>
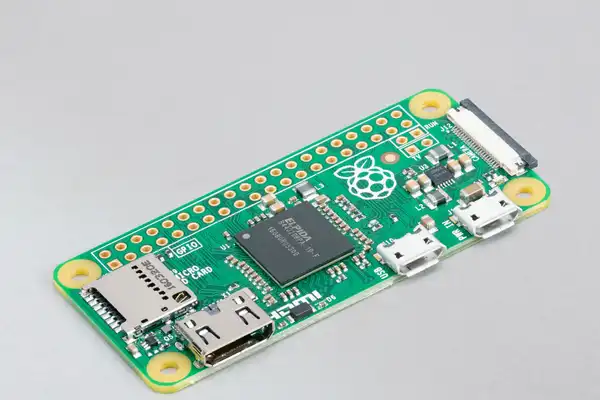
<p>If you are interested in this type of geeky stuff, I’d suggest that you bring this to the next level. I, for example, run mine using a cron schedule (every 30 minutes during the day) on my <a href="https://www.raspberrypi.com/products/raspberry-pi-zero/">Raspberry Pi Zero</a>. I like the Zero as it uses 0.5 watts when it is running normally and peaks at about 2 watts when under heavy usage. Its so efficient that I leave it running 24/7 without worrying about it wasting electricity.
<img src="/assets/images/raspberryPiZero.png" alt="Raspberry Pi Zero used to run the battery monitor script on a schedule" /></p>]]></content><author><name>Eoin Clayton</name></author><summary type="html"><![CDATA[Using the FoxESS Open API and a Bash script to monitor home battery charge and send a Pushover phone notification when the battery runs low.]]></summary></entry><entry><title type="html">3D Printing</title><link href="https://blog.eoinclayton.com/2026/03/01/3d-printed-light/" rel="alternate" type="text/html" title="3D Printing" /><published>2026-03-01T00:00:00+00:00</published><updated>2026-03-01T00:00:00+00:00</updated><id>https://blog.eoinclayton.com/2026/03/01/3d-printed-light</id><content type="html" xml:base="https://blog.eoinclayton.com/2026/03/01/3d-printed-light/"><![CDATA[<p>A previous post described how I use a Delcom USB light to alert me to workplace notifications: PRs ready for review, Production incidents underway, etc.</p>

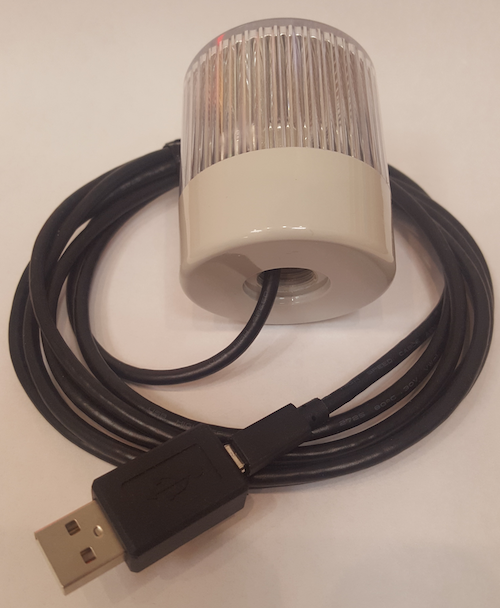
<p>The light works great, it’s just very… industrial… looking. 
<img src="/assets/images/delcomLight.png" alt="Delcom 904017-B USB notification light, industrial-looking on its own" /></p>

<p>Lets see if we can make it look better!</p>

<h2 id="3d-model">3D Model</h2>
<p>Delcom doesn’t provide a nice container for the light, as far as I’m aware.
Years ago when 3d printing was just getting going, I downloaded a “Makies Cauldron” model. It has a Creative Commons Attribution license and you can find it here: https://www.thingiverse.com/thing:178670 .</p>

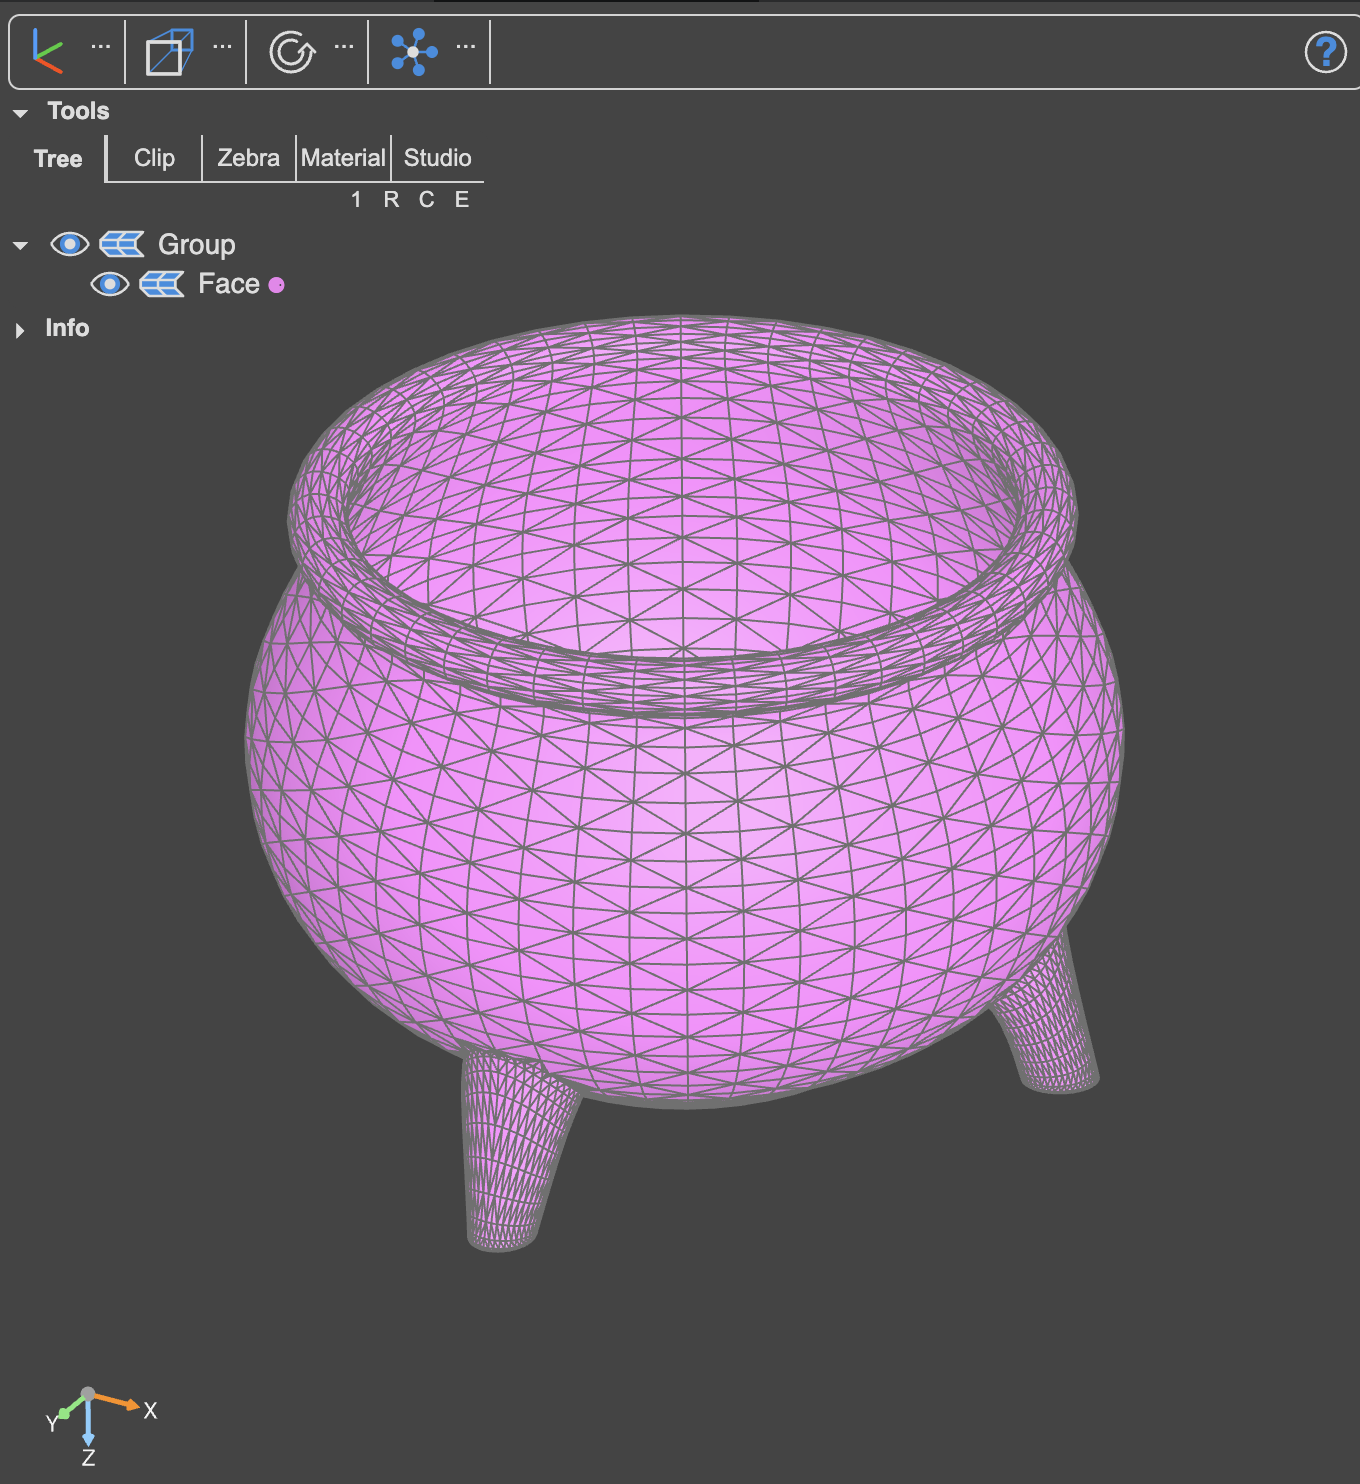
<p>The model in the provided STL file looks a bit like this:
<img src="/assets/images/cauldronSTL.png" alt="3D model of the Makies Cauldron STL file" /></p>

<p><a href="/assets/images/MAKIES_Cauldron.stl">Download MAKIES_Cauldron.stl</a></p>

<p>It’s a good start, but there are two issues</p>
<ol>
  <li>What do we do with the USB cable? Will I put the light into the cauldron and have the cable snake its way out the top? That’s not great. I think we should cut out a small rectangle so that the USB-A cable can fit through the hole</li>
  <li>If I put the light in the cauldron, the cauldron walls will block the light. I think we should do a cut-out from one side of the cauldron</li>
</ol>

<p>10 years ago, I did the edits myself in a Blender style tool. Times have changed though so lets see what the AIs can do today</p>
<h2 id="time-for-cadquery">Time for CADQuery</h2>
<p>I tried Claude first, but it refused to deal with the .stl file:</p>
<blockquote>
  <p>“No, I can’t meaningfully edit STL files. STL files contain raw 3D mesh geometry (thousands of triangular facets) and modifying them requires specialized 3D modeling software”</p>
</blockquote>

<p>No prob Claude, next up was Copilot. It seemed almost excited, if that is possible, at the prospect of modelling something:</p>
<blockquote>
  <p>“Nice project! — turning a status light into a little cauldron is very on-brand geek magic.”</p>
</blockquote>

<p>…and later on while it was thinking:</p>
<blockquote>
  <p>“Nice, this is a fun little build”</p>
</blockquote>

<p>😂</p>

<p>After much back and forth with the AIs, It turns out that they prefer dealing with something called CADQuery. CADQuery is a Python library for manipulating STL files. You have the STL file yourself, the AI generates the Python code to manipulate the STL and the resulting output should hopefully be what you want.</p>

<p>As Copilot seemed excited to help, I used its help to generate the initial CADQuery Python file for updating the cauldron.</p>

<details> 
<summary>Here is the AI Prompt I gave to Copilot if you'd like to give it a go also</summary> 
I'd like your help with a 3d model for printing.<br /> 
There is a 3d Cauldron here: https://www.thingiverse.com/thing:178670. I'd like to put my Delcom 904017-B USB light into it. <br />
There should be a 3mm gap on each side of the light so that it isn't too tight in the Cauldron.
Please generate a CadQuery script for me and I'll apply the script at my side to update the .stl file
<ol>
<li>Can you work out the size of the Delcom usb light? Then resize the cauldron so that the light can fit. Keep the same scale, just make it bigger/smaller to fit. I'd like the top to be flush with the rim of the cauldron</li>
<li>Then, can you cut a small rectangular hole at the "back" of the cauldron so that the USB A jack and cable can fit through it. Again, best give a couple of extra millimetres gap around the connector so that its not too tight. The hole should be about 10mm above the base of the cauldron bowl.</li>
<li>Finally, when the light is inside the cauldron it might be difficult to see if I put the cauldron above me on a shelf. Can you cut a round semi-circular hole on the "front" of the cauldron? It should start at the rim of the cauldron and should have a radius of a third of the height of the cauldron bowl</li>
</ol>
</details>

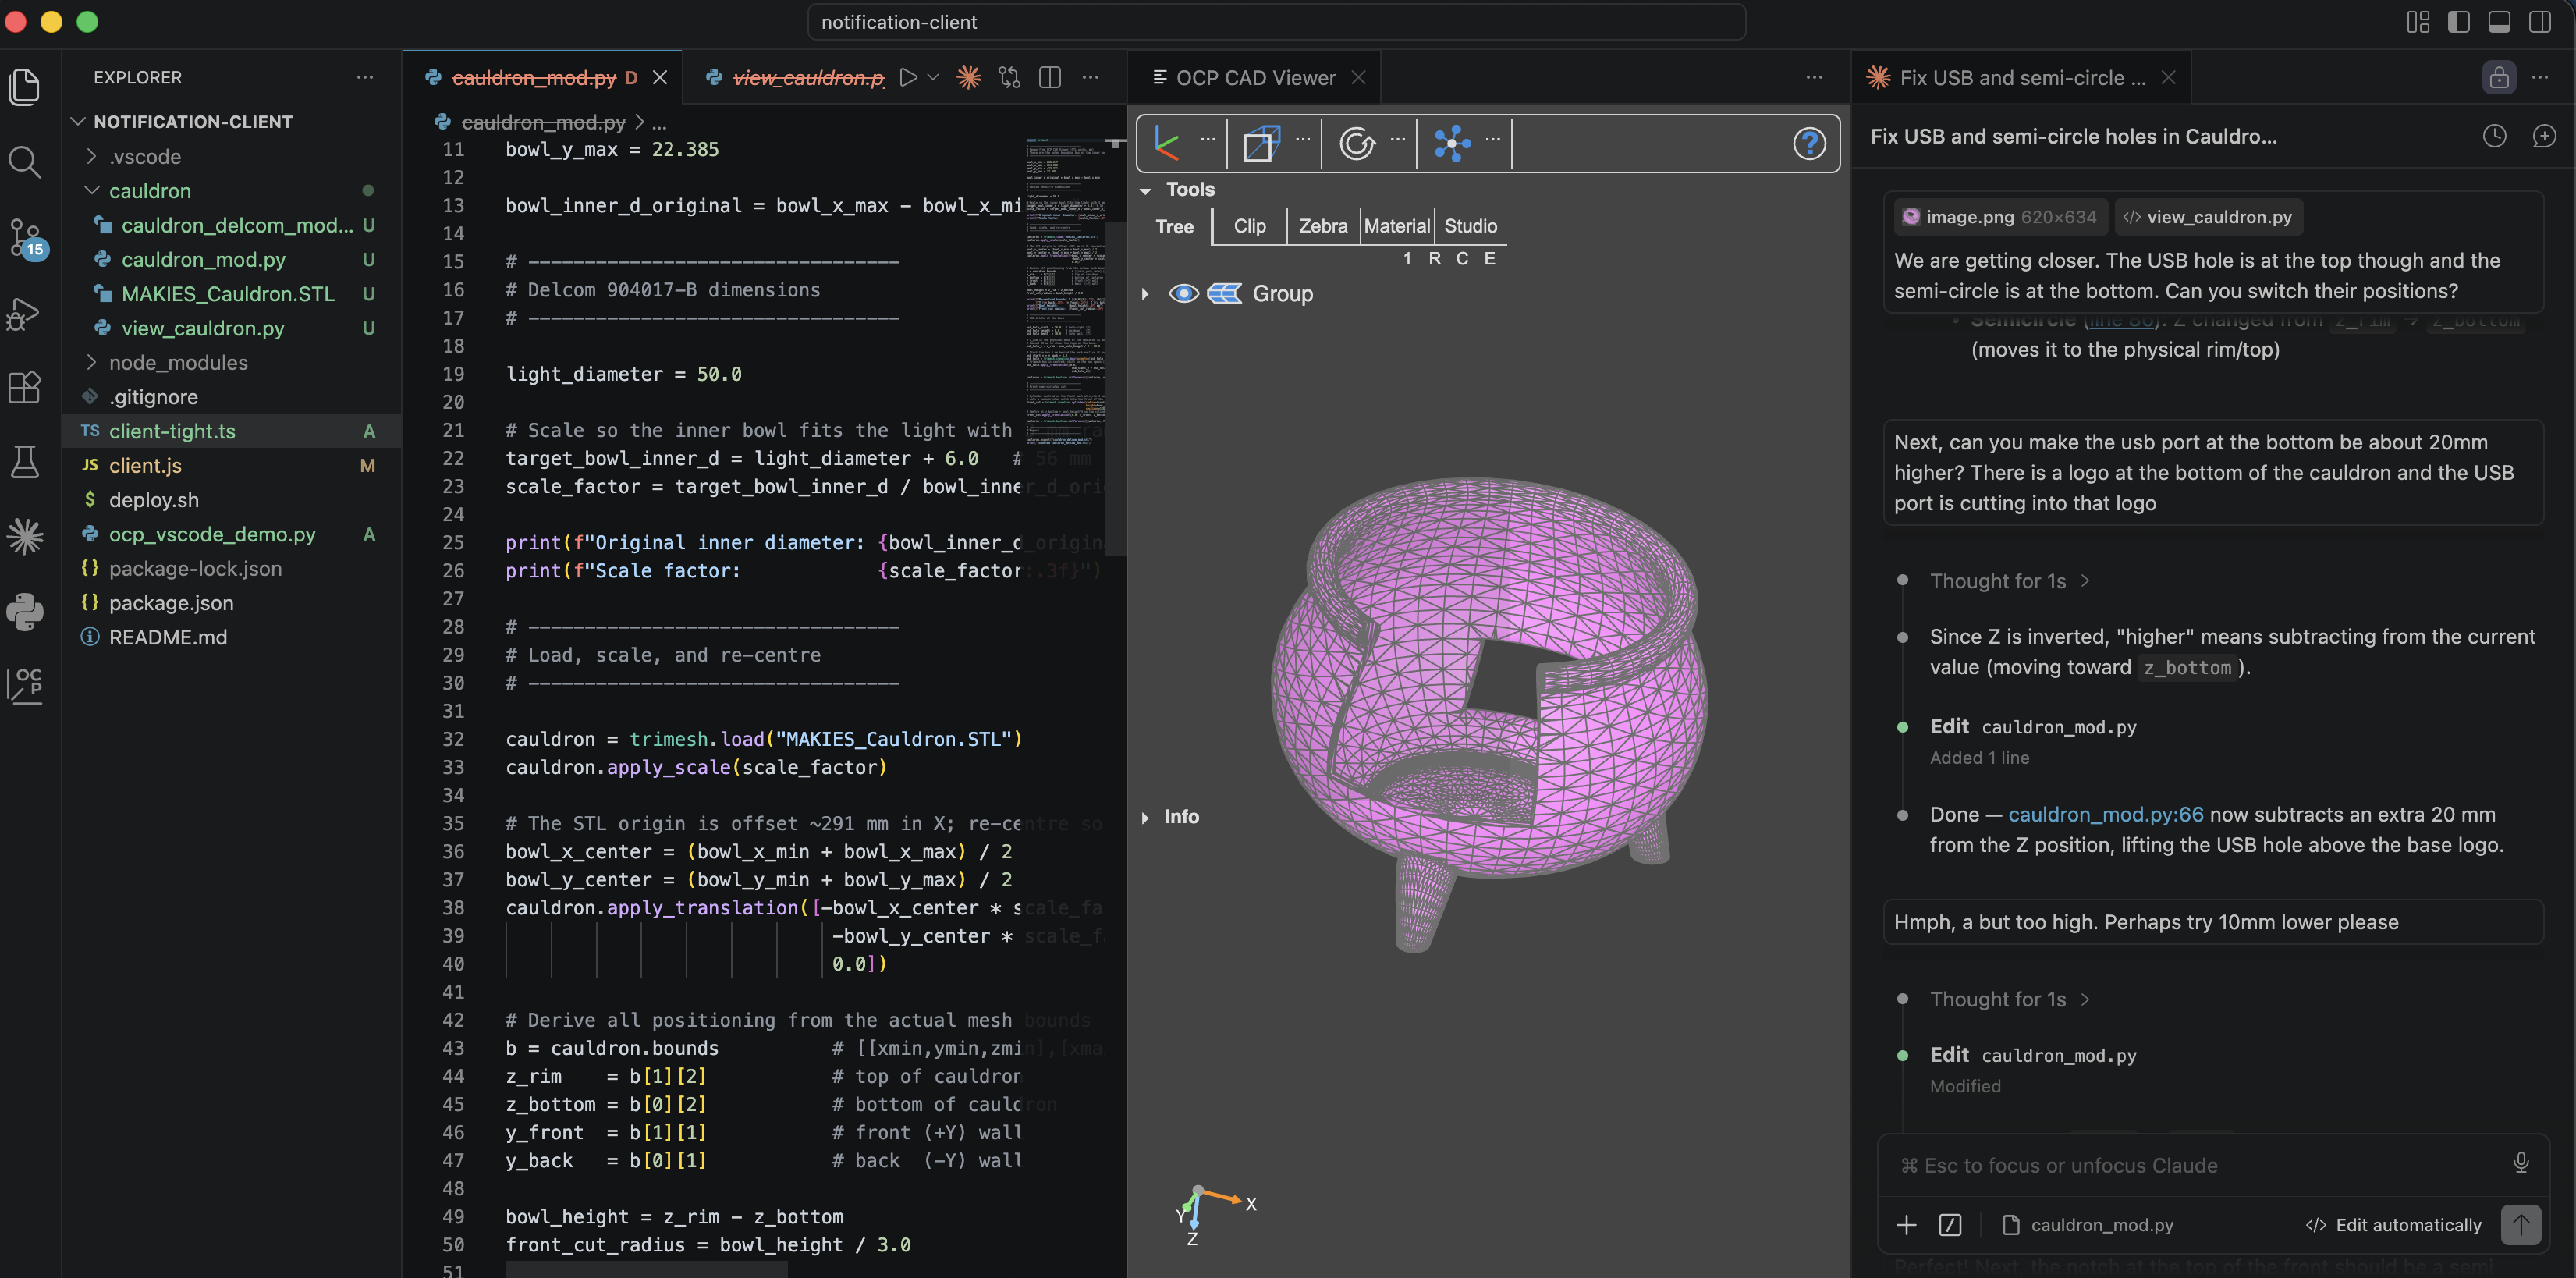
<p>Then, as VSCode is my tool of choice, I installed the “OCP CAD Viewer” extension in VSCode and had Claude manipulate the Python file. Claude is more than happy to code in Python. I would take a screenshot of the current state of the model, tell it what I wanted to be changed and it would update the Python script to change the STL file. OCP CAD Viewer would then display the updated STL file:
<img src="/assets/images/vscodeCad.png" alt="OCP CAD Viewer in VSCode showing the edited cauldron model" /></p>

<p>There was a LOT of back and forth but we got there in the end.</p>
<h2 id="the-model-is-ready-how-to-print">The model is ready. How to print?</h2>
<p>Once your STL file is ready, it’s time to print! I don’t have a 3D printer at home, so I found an online service. As I live in Canberra, Australia, I went with this local provider: https://3dprintingcanberra.com.au/. 
I uploaded the model, chose PETG in black as the “filament” (i.e. the material for making the cauldron) and soon the model was ready for collection.</p>

<h2 id="how-does-it-look">How does it look?</h2>

<p>Watch this space! I’ll upload a photo shortly</p>

<h2 id="final-thoughts">Final thoughts</h2>
<p>Having the Delcom usb light in its cauldron seems to have fulfilled some long-buried cultural desire from my Irish background: I finally have my very own… Pot of Gold!
<img src="/assets/images/potOfGold.png" alt="Finished 3D-printed cauldron enclosure with the USB light installed" /></p>]]></content><author><name>Eoin Clayton</name></author><summary type="html"><![CDATA[Using AI (Claude, Copilot, and CADQuery) to redesign a Thingiverse cauldron STL model into a custom enclosure for a Delcom USB notification light, then 3D printing it.]]></summary></entry><entry><title type="html">USB Notification Light</title><link href="https://blog.eoinclayton.com/2026/02/01/usb-light/" rel="alternate" type="text/html" title="USB Notification Light" /><published>2026-02-01T00:00:00+00:00</published><updated>2026-02-01T00:00:00+00:00</updated><id>https://blog.eoinclayton.com/2026/02/01/usb-light</id><content type="html" xml:base="https://blog.eoinclayton.com/2026/02/01/usb-light/"><![CDATA[<p>Many years ago, I used to work at a magazines related company (hi ACP Magazines peeps!).  My team at the time built a subscription system for the company, enabling customers to subscribe to their favourite magazine for the year ahead, pay monthly/yearly, etc.</p>

<p>It’s always good to help keep the team morale high, and to help with that, I installed a USB notification light in our pod in the office. Then, every time there was a sale the light glowed yellow like gold. Good times :)</p>

<p><img src="/assets/images/delcomLightAboveDesks.png" alt="Delcom USB notification light mounted above office desks" /></p>

<p>You may want to do something similar. Read on to find out how it all works!</p>

<h2 id="behold-the-delcom-904017-b">Behold: the Delcom 904017-B!</h2>

<p>Matching the industrial name of the <a href="https://www.delcomproducts.com/products_USBLMP.asp">Delcom 904017-B</a>, the light itself is also industrial in appearance. While not a beauty, it is sturdy: mine has lasted for 10+ years.
<img src="/assets/images/delcomLight.png" alt="Delcom 904017-B USB notification light close-up" /></p>

<p>In addition to being durable, it also comes with <a href="https://www.delcomproducts.com/productdetails.asp?PartNumber=900000">example code</a> showing you how to use it. I don’t know about you, but my C++ and VB.Net are a bit rusty though. Time for a more modern language</p>

<h2 id="nodejs-to-the-rescue">NodeJS to the rescue</h2>

<p>The spec <a href="https://www.delcomproducts.com/downloads/USBVIHID.pdf">here</a> describes how you can send a “direct write command” (see page 9) with the appropriate bit positions to tell the light which colour you want (see page 5).
You will need to know the “vendor id” of the USB device and that is on page 13 of <a href="https://www.delcomproducts.com/downloads/usbiohid.pdf">this spec</a>.</p>

<p>The following Typescript nodeJS code uses the nodeJS “hid” library to send colour commands to the USB light.</p>

<div class="language-plaintext highlighter-rouge"><div class="highlight"><pre class="highlight"><code>import HID from "node-hid";


const COLOURS: Record&lt;string, number[]&gt; = {

   red: [101, 2, 0xfd],

   green: [101, 2, 0xfe],

   yellow: [101, 2, 0xfb],

   off: [101, 2, 0xff],

};


const color = process.argv[2];

const command = COLOURS[color];


if (!command) {

   console.error("Usage: ts-node client-tight.ts red|green|yellow|off");

   process.exit(1);

}


const deviceInfo = HID.devices().find(d =&gt; d.vendorId === 0x0fc5);

if (!deviceInfo?.path) {

   console.error("No Delcom device found");

   process.exit(1);

}


const device = new HID.HID(deviceInfo.path);

device.write(command);

device.close();
</code></pre></div></div>

<h2 id="what-do-i-use-mine-for-these-days">What do I use mine for these days?</h2>
<p>I work from home these days, so for now its morale-boosting days are over. I do use it as a tool to prompt me though</p>

<ul>
  <li>PR Prompter: a script checks Github every 15 mins and if there is a new PR from one of my team members, the light glows green</li>
  <li>JIRA Prompter: a script checks JIRA ITSM every 5 mins and if there is a new low-mid priority ticket for my team, the light glows yellow</li>
  <li>Production Dramas? Pulse (on / off) the light red
    <ul>
      <li>JIRA ITSM: a script checks every 5 mins for high-priority P1 issues</li>
      <li>DataDog: a script checks every 5 mins for any major prod issues</li>
    </ul>
  </li>
</ul>]]></content><author><name>Eoin Clayton</name></author><summary type="html"><![CDATA[Using a Delcom USB HID light and a small NodeJS/TypeScript script to turn PR reviews, JIRA tickets, and production incidents into an at-a-glance colour signal.]]></summary></entry><entry><title type="html">Solar PV Viewer</title><link href="https://blog.eoinclayton.com/2026/01/01/solar-pv-viewer/" rel="alternate" type="text/html" title="Solar PV Viewer" /><published>2026-01-01T00:00:00+00:00</published><updated>2026-01-01T00:00:00+00:00</updated><id>https://blog.eoinclayton.com/2026/01/01/solar-pv-viewer</id><content type="html" xml:base="https://blog.eoinclayton.com/2026/01/01/solar-pv-viewer/"><![CDATA[<p>I am fortunate enough to have a solar system on my house to help with power bills. The other members of the household ask me every now and then about solar and want to know if we are generating enough to power the house. Rather than keep asking Dad, better if they are empowered to work it out for themselves. Time for a Solar Monitor!</p>

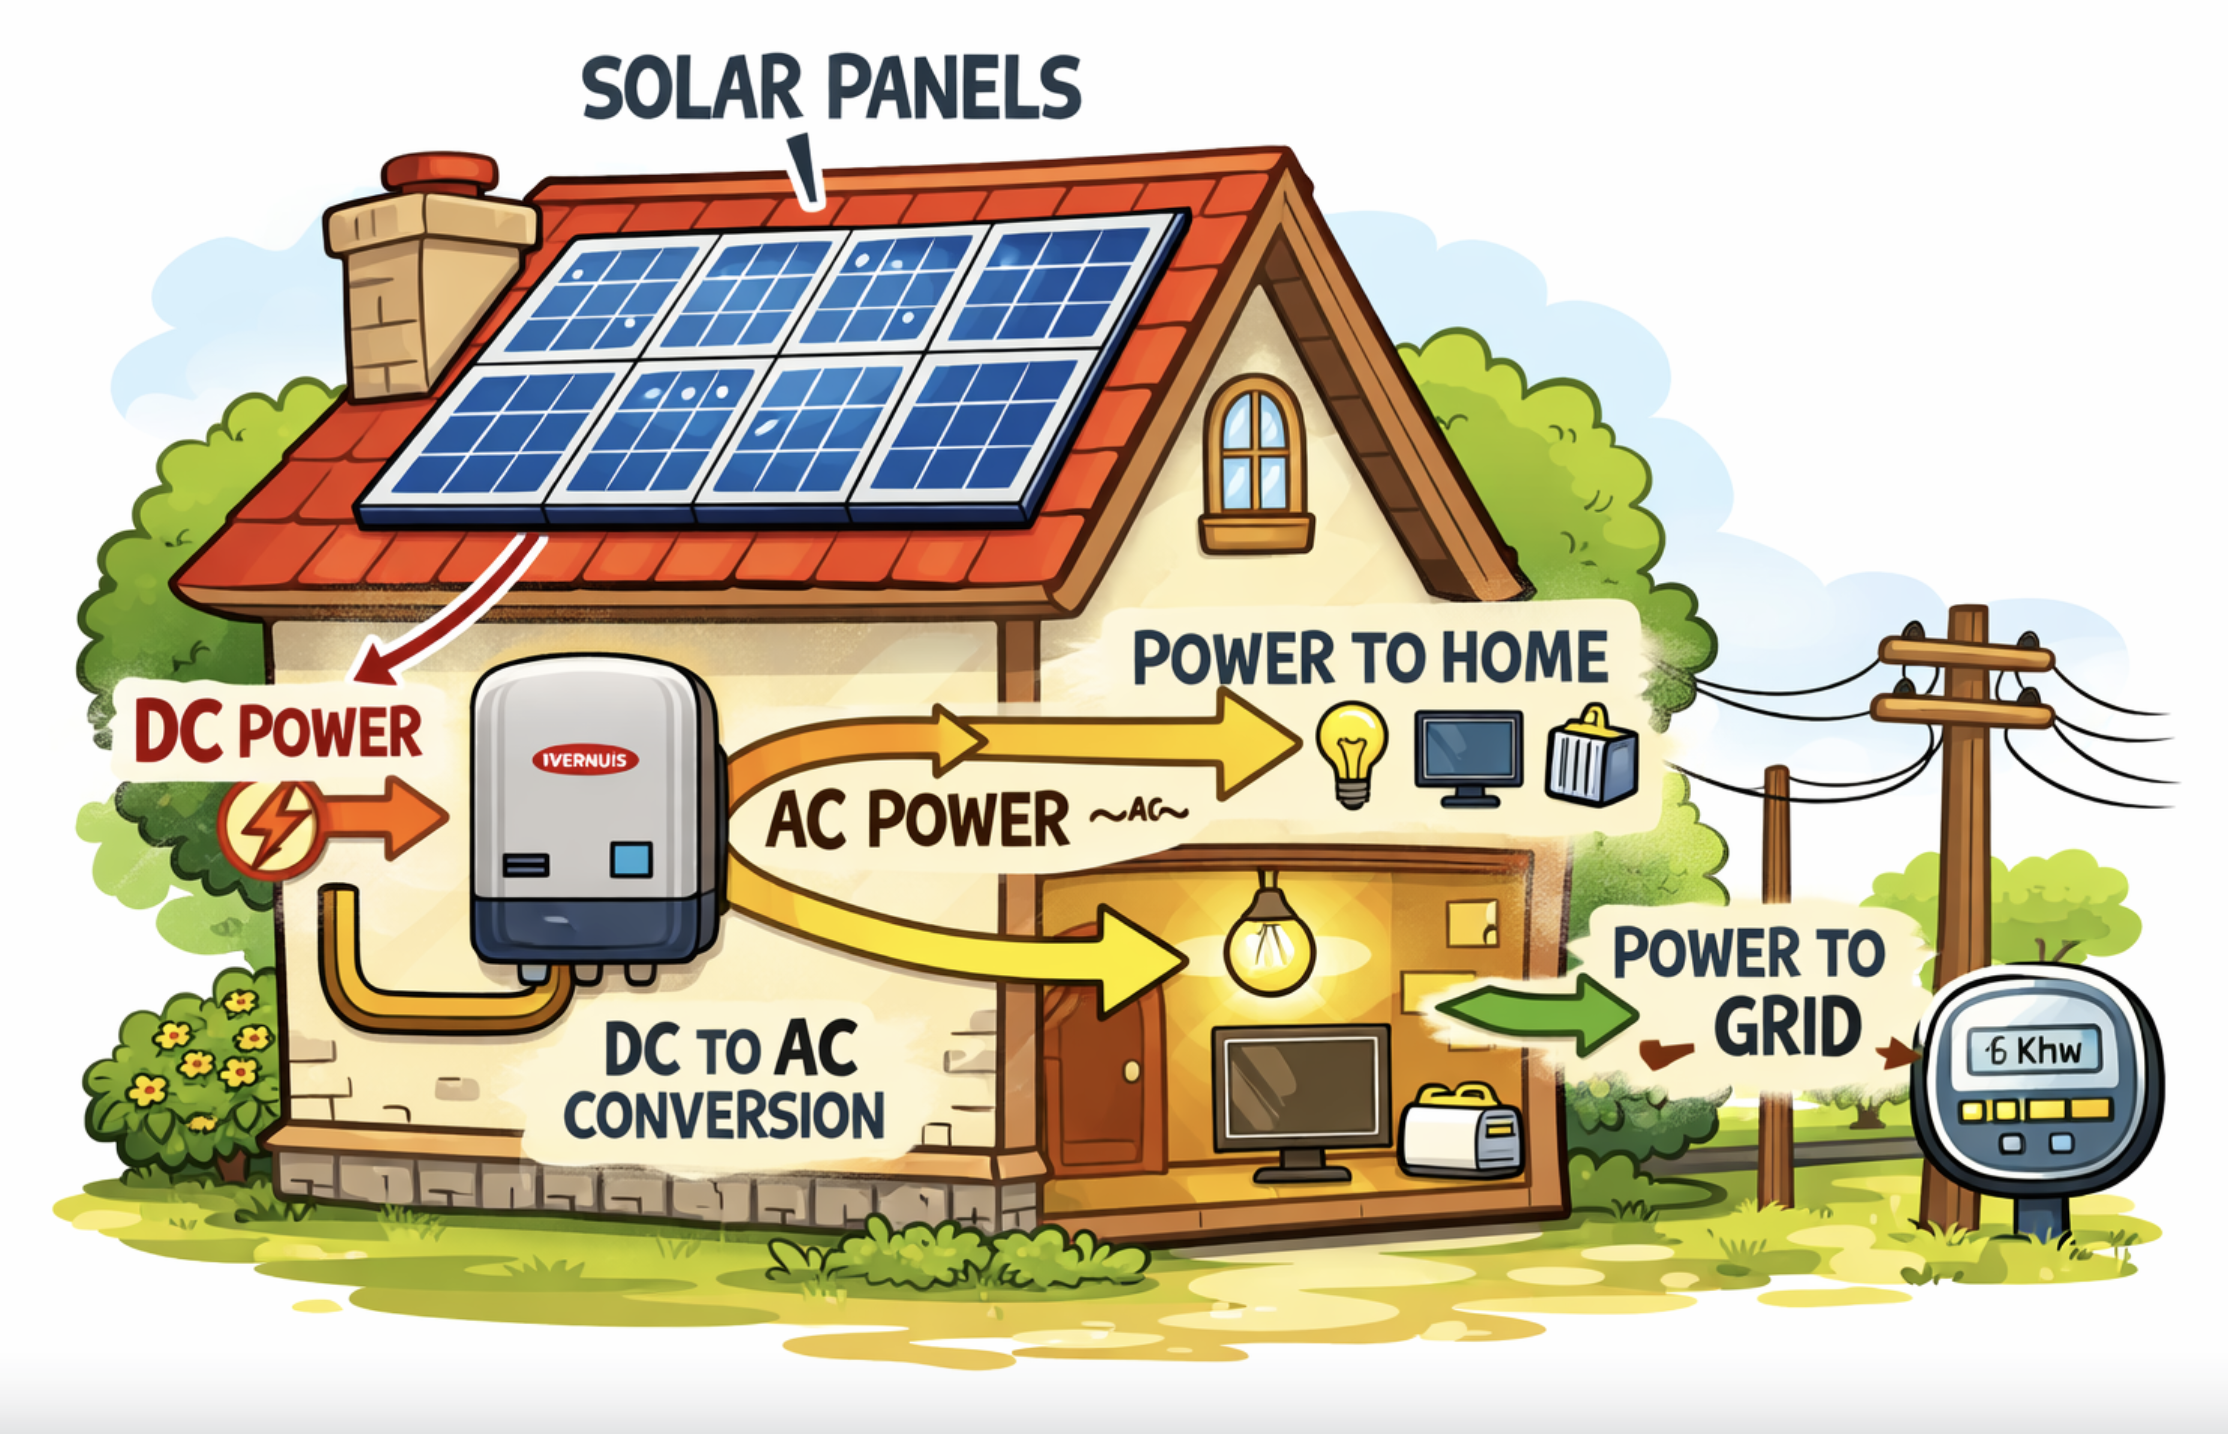
<h2 id="the-magic-that-is-an-inverter">The magic that is an inverter</h2>
<p>Solar systems come with an “Inverter” to convert the DC power generated by the solar panels to AC power for the house and the grid. All power for the house ends up going in and out through the inverter.</p>

<p><img src="/assets/images/inverter.png" alt="Fronius solar inverter mounted on a wall" /></p>

<p>The trick is to be able to use the inverter’s API to see what it is up to.</p>

<blockquote>
  <p><strong>Important:</strong> I have a Fronius Inverter and so this guide is intended for Fronius Inverters only. Other Inverters will be similar though and you could use this guide for… inspiration.</p>
</blockquote>

<h2 id="first-you-are-going-to-need-the-ip-address">First: You are going to need the IP address</h2>
<p>For this guide to work, you will need the IP address of the inverter. 
I’m not going to sugarcoat it: getting the ip address is a bit of a process.</p>

<p>Best to go to <a href="https://www.replenishableenergy.com.au/customer-support/how-to-connect-your-fronius-inverter-to-the-internet/">the guide here</a> to see how to get to the Settings-&gt;Network area to see your inverter’s IP address.</p>

<p>My IP address was 192.168.0.113. Yours will be different, but I’ll use 192.168.0.113 in this guide.</p>

<blockquote>
  <p><strong>Tip:</strong> If you are up for it, I’d suggest you go to your home router, give your device a name and give it a static ip address so that it won’t change. You can then goto your router and see what the ip address is if you need it. Much easier than the Fronius guide.</p>
</blockquote>

<h2 id="next-does-the-fronius-inverter-have-an-api">Next: does the Fronius inverter have an API?</h2>
<p>Yes it does!</p>

<p>There are handy guides from Fronius <a href="https://www.fronius.com/en-au/australia/solar-energy/installers-partners/technical-data/all-products/system-monitoring/open-interfaces/fronius-solar-api-json-">here</a> detailing how it works.</p>

<p>The Fronius inverter api url you want to use will be similar to: http://192.168.0.113/solar_api/v1/GetPowerFlowRealtimeData.fcgi
It will return a JSON object that looks like:</p>
<div class="language-plaintext highlighter-rouge"><div class="highlight"><pre class="highlight"><code>{
   "Body" : {
      "Data" : {
         "Inverters" : {
            "1" : {
               "DT" : 75,
               "E_Day" : 22733,
               "E_Total" : 50581300,
               "E_Year" : 3863573.25,
               "P" : 2106
            }
         },
         "Site" : {
            "E_Day" : 22733,
            "E_Total" : 50581300,
            "E_Year" : 3863573.25,
            "Meter_Location" : "grid",
            "Mode" : "meter",
            "P_Akku" : null,
            "P_Grid" : -1534.8900000000001,
            "P_Load" : -571.1099999999999,
            "P_PV" : 2106,
            "rel_Autonomy" : 100,
            "rel_SelfConsumption" : 27.11823361823361
         },
         "Version" : "12"
      }
   },
   "Head" : {
      "RequestArguments" : {},
      "Status" : {
         "Code" : 0,
         "Reason" : "",
         "UserMessage" : ""
      },
      "Timestamp" : "2026-05-05T15:24:24+10:00"
   }
}
</code></pre></div></div>

<ul>
  <li>P_Load is how much the house is using.</li>
  <li>P_PV is how much solar is being generated.</li>
  <li>P_Grid is how much is being exported to the grid.</li>
</ul>

<h2 id="were-gonna-need-a-website">We’re gonna need a website</h2>
<p>To help visualise what the Solar system is up to, we are going to need a website.
In the “olden days”, I would have coded it myself.  These days, AI can help.</p>

<p>Here is the prompt I used:</p>

<details> 
<summary>AI Prompt for site</summary> 
Can you make me an HTML + Javascript website to show a linegraph of the watts generated via my solar system via my Fronius inverter?<br />
<br />	
Use chart.js to render the graph full screen. I don't want any npm packages to version maintain. Use the CDN url for chart.js<br />
<br />
The Fronius inverter api url is: http://192.168.0.113/solar_api/v1/GetPowerFlowRealtimeData.fcgi
It will return a JSON object.<br />
Use the Body.Data.Site.P_PV JSON value on the chart with a green line<br />
Use the Body.Data.Site.P_Load JSON value on the chart with a red line. The value is negative by default, so do use Math.Abs to make it into a positive number<br />
<br />
I like to follow the KISS principle so keep the code as tight as possible.  No need for tests or error handling.<br />
Have the graph call the api every 3 seconds and update the graph accordingly please.<br />
</details>

<h2 id="ugh-cors">Ugh, CORS!!!</h2>
<p>The Cross-Origin Resource Sharing security protocol was introduced decades ago to help protect users making api calls via browsers, and has been making developers’ lives difficult ever since :)
In short, if the API call is to the same origin as the site, you are ok. However, if the API call is to a different origin and the call doesn’t match the CORS settings for the API, or the CORS settings are missing entirely, the browser blocks the call.</p>

<p>Unfortunately for us, the Fronius inverter API lacks the CORS settings. It appears that it was never intended to be called directly from a browser. 
However, this is more of a speed bump than a roadblock for us: we’ll just add a small server into the mix and use it as a “proxy”.</p>

<p>It’s AI time again:</p>
<details> 
<summary>AI Prompt for server</summary> 
The Fronius api lacks CORS and so can't be called directly by the site.<br />
Can you add a small proxy server written in Python which calls the Fronius url?<br />
Can you then update the site to call the proxy.<br />
Best make the server accept the ip address of the fronius inverter as a parameter<br />
Finally, I'll never remember to start both the server and the site. Can you add in a start.sh file to ask the user for the Fronius inverter IP address and then start the server? If the user cancels out of the script, it should kill the server. Best chmod the script to be executable please<br /> 
</details>

<h2 id="can-i-see-it-in-action">Can I see it in action?</h2>

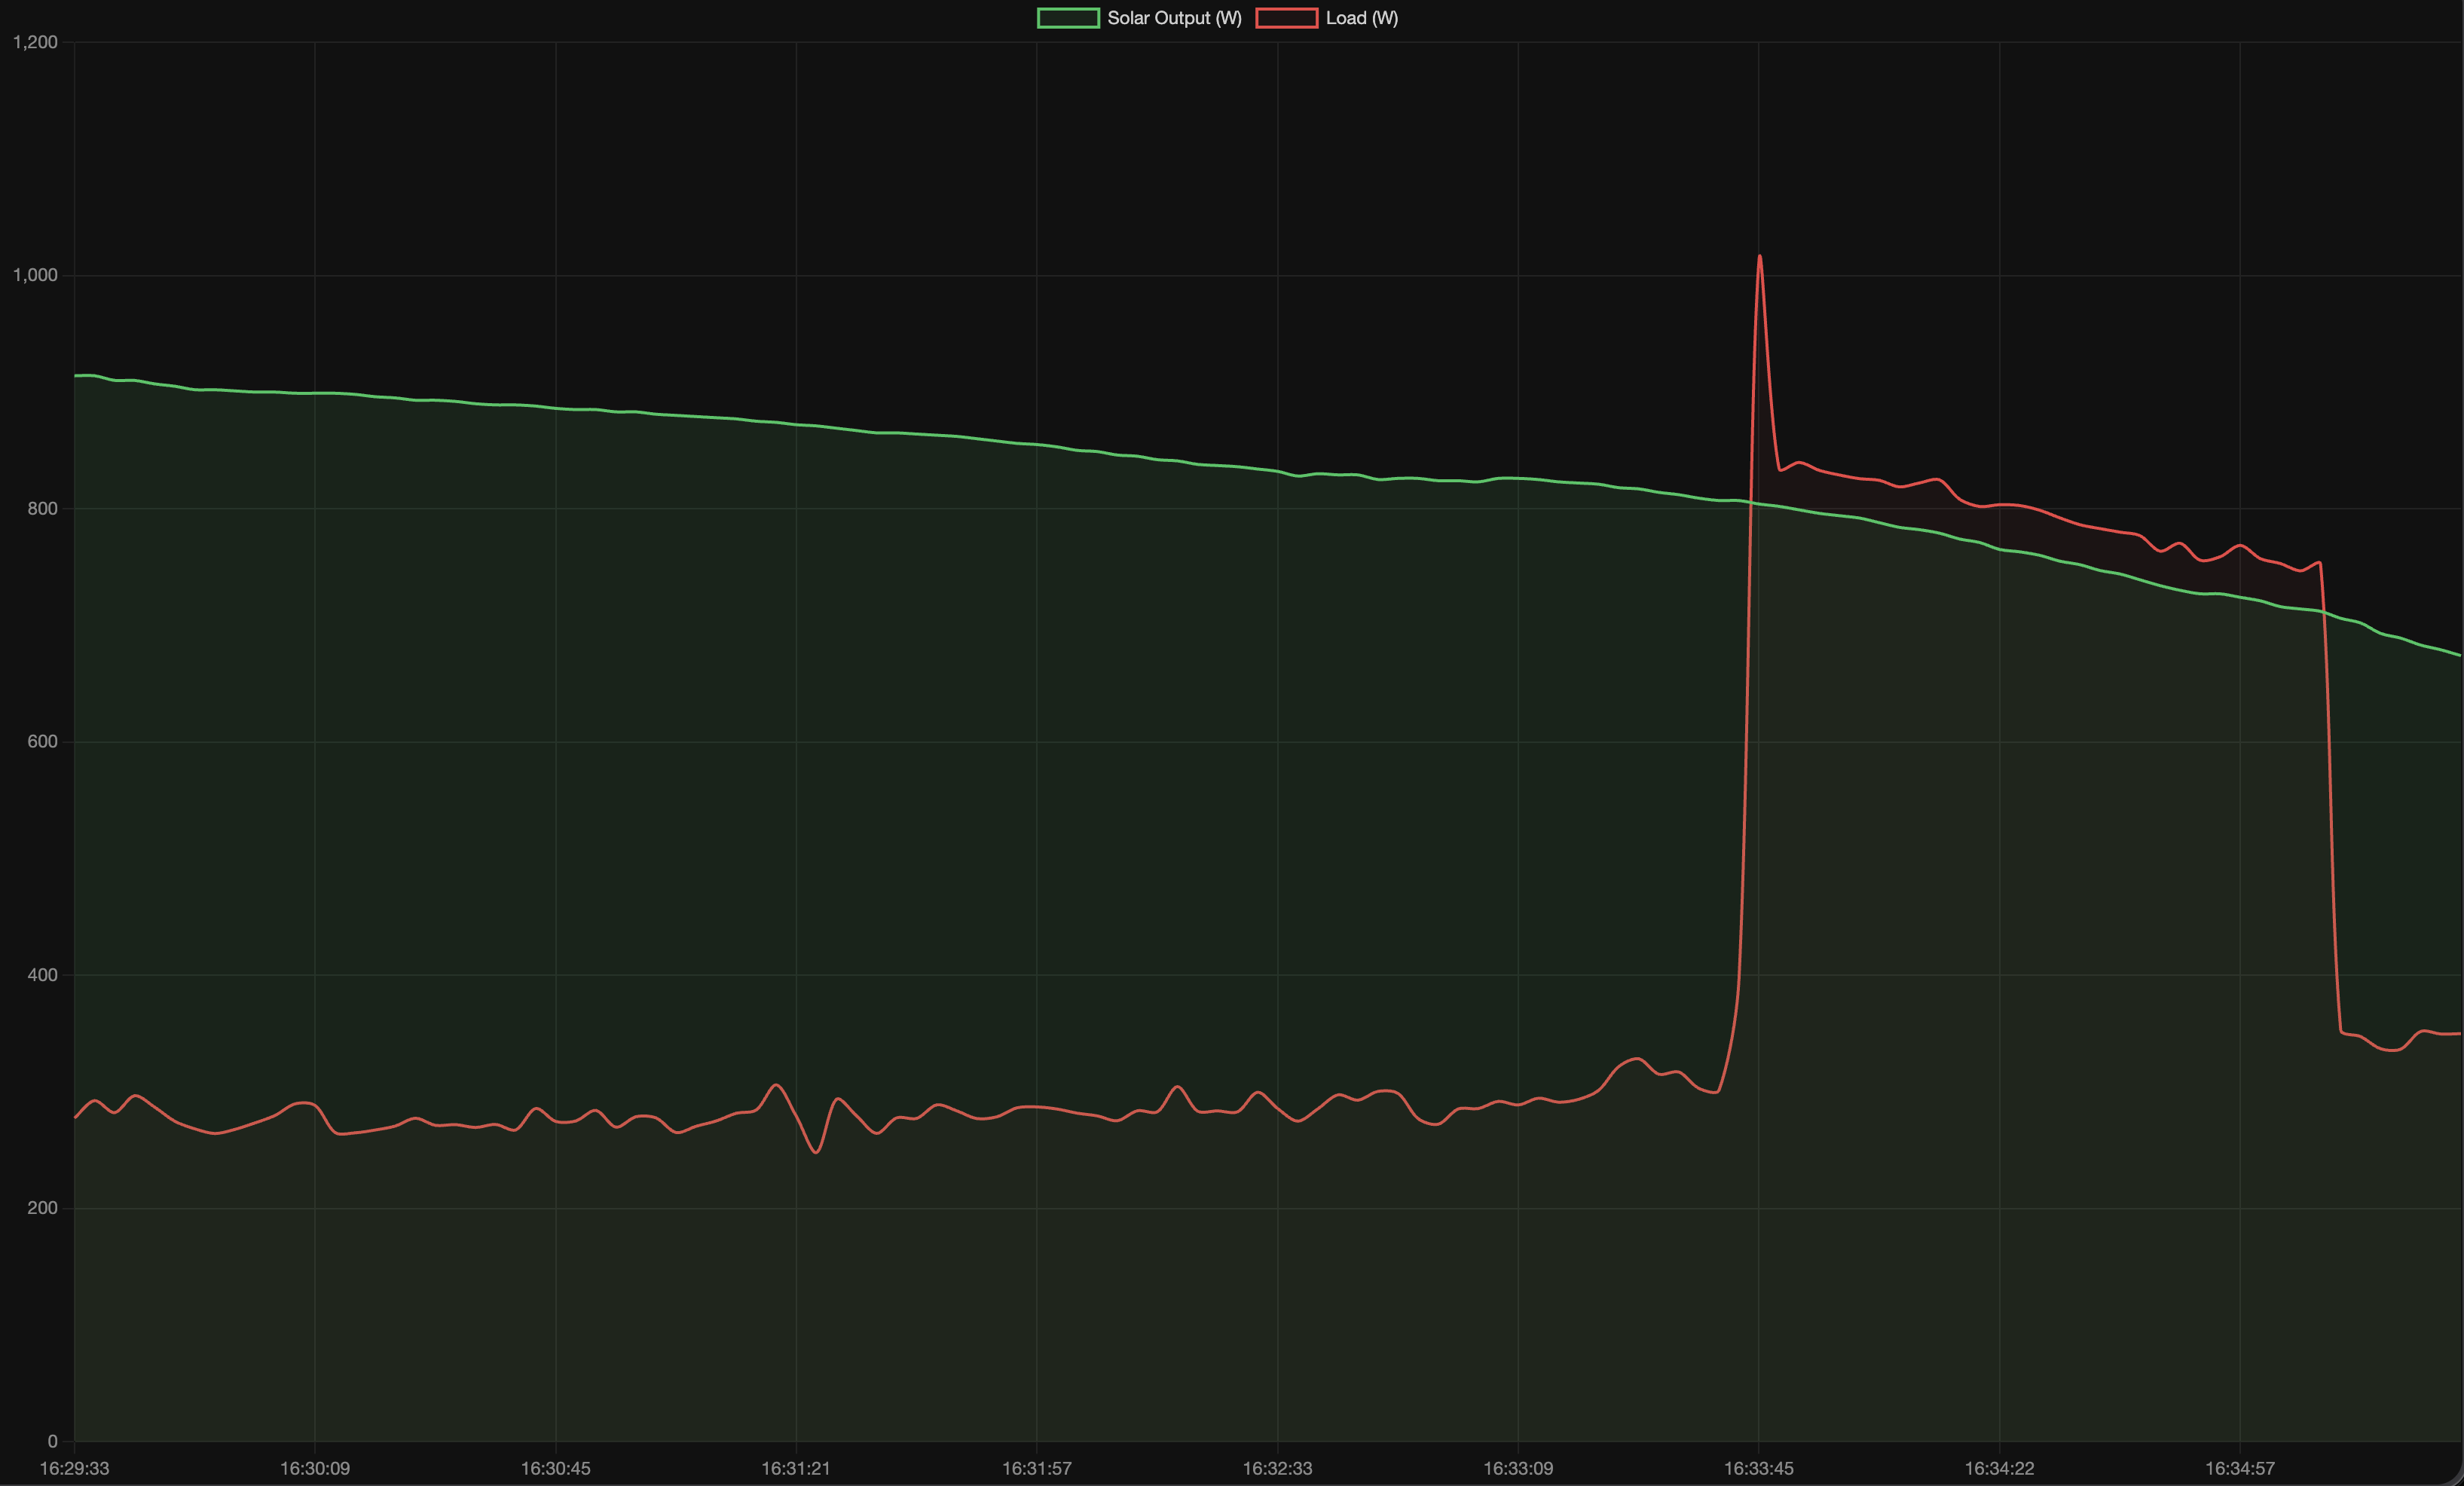
<p>Success! This is what it looks like:
<img src="/assets/images/solarMonitorExample1.png" alt="Line chart of solar generation versus house load over time" /></p>

<p>The house was generating lots of excess solar (green line), but the usage jumped up a bit near the end (red line)</p>

<h2 id="is-the-source-code-available">Is the source code available?</h2>
<p>Absolutely! Find the source code <a href="https://github.com/eoinclayton/fronius-solar-viewer">in Github</a></p>]]></content><author><name>Eoin Clayton</name></author><summary type="html"><![CDATA[How to pull real-time generation data from a Fronius solar inverter's local API and build an AI-generated web dashboard to visualise it, CORS proxy included.]]></summary></entry></feed>